
What you will need/what I used:
Ripspeed Black Stretch Grid Competition Mesh - Link via Halfords - £24.99
Loctite Glue Gun - Link via Halfords - £9.99
Halfords Cable Ties - Link via Halfords - £2.79
General tools - Hex Sockets/Screw Drivers/Pliers/Wire Cutters (I used Scissors :lol: )
Gloves - optional
Soft Sheet to sit the bumper on - I also used a foam mat to sit the bumper on as pictured below
Step 1:
Remove your front bumper as described on page 20-87 of the RSX Manual here: RSX Workshop Manual
I recommend the help of another person to remove it and put it back on to avoid any potential paint damage.

Step 2:
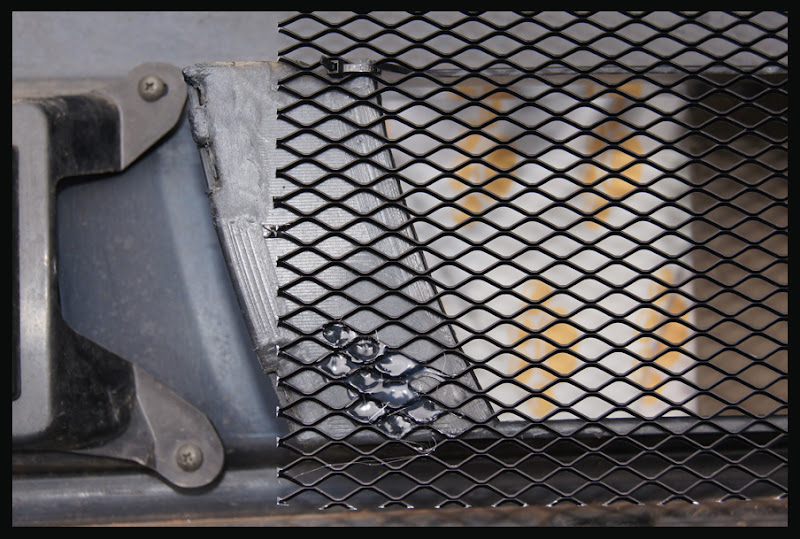
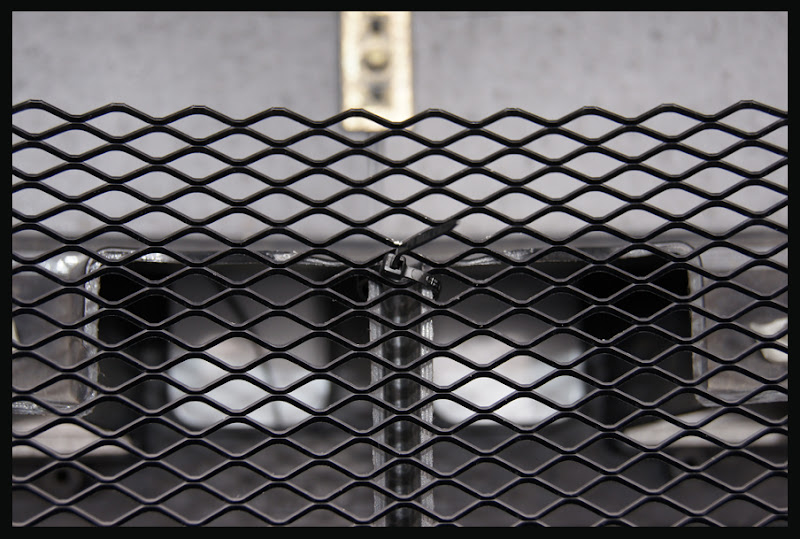
Cut your mesh to the required size to overlap both the top and bottom of the bumpers radiator vent, then you will want to secure this using 3 small cable ties in the locations pictured (on both sides and one in the middle on the top of the middle post) including using your glue gun to secure the bottom half of the mesh to the plastic of the bumper.
Please Note: The cable ties I used were a VERY tight fit and very fiddly!
Step 3 - Brake Ducts

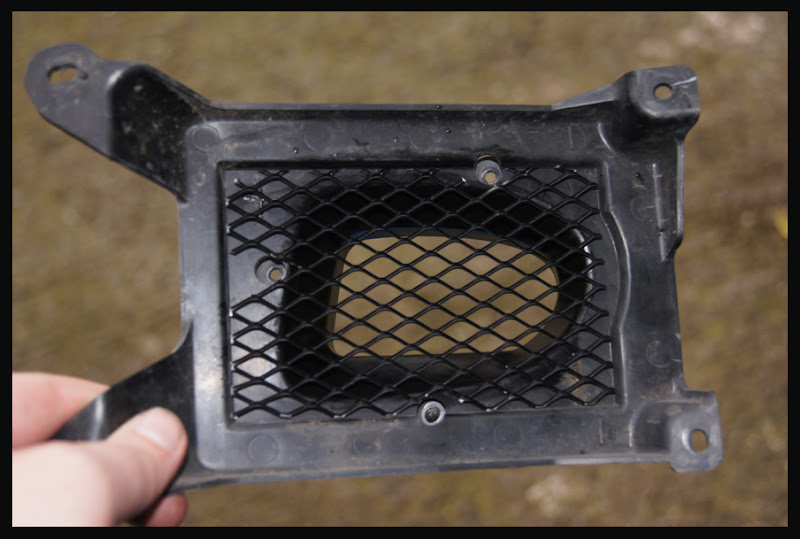
Unscrew the fixings of the Brake Ducts on the inside of the bumper, there are 7 screws in total. 4 screws hold the duct onto the bumper (outside edge) and 3 hold the face of the duct on (inside edge) Pictured below.
The duct on the outside of the bumper (pictured above) will fall out when you unscrew the 3 screws on the inside edge of the holder, which in turn, will reveal the old mesh which is stapled to the inside. Remove the staples with your pliers and the old mesh (chicken wire!) will fall out.
Using the old mesh as a template, trim your new mesh to the correct size and make sure you cut holes where the Duct face posts insert.
Step 4
Put your Brake Ducts back together the same way you took them off! Providing you did a perfect fit, you wont have needed to re-staple the mesh to the holder.
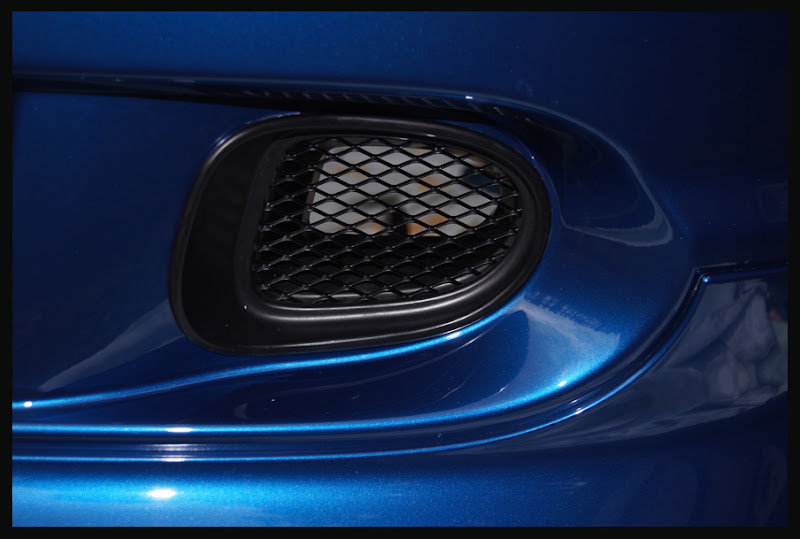
They should now look like this, happy days! :lol:
Step 5
Put your bumper back on in the reverse order of how you took it off, make sure you have someone to help you and TAKE YOUR TIME!
Please note: The plastic covers underneath the car need to go back exactly how they were before. Mine were on the outside of the bumper, they need to be positioned inside! and the arch linings will also be a bit of a problem and need to be guided back behind the sides of the bumper.
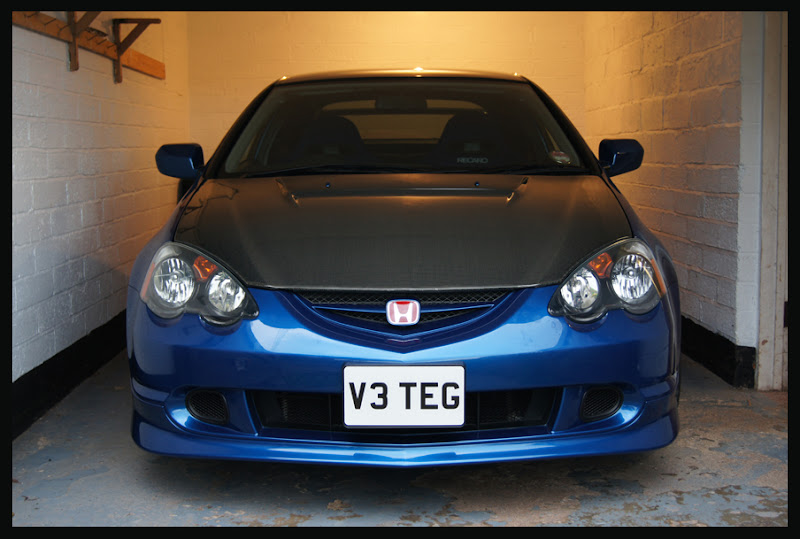
Step 6
Admire! yes, you car now looks completely badass! :lol: Treat yourself to a Cold Drink, or like I did, compliment with a big fat dirty Chinese Takeaway! :lol:
Hope this little guide helps anyone wishing to do the same!
SPECIAL NOTE:
The mesh will look different from different angles, I made sure the mesh looked 'thicker' from eye level. Please be aware of this as you will want all the mesh on your car to match!
Thicker angle will make your radiator more obscured (my option), the thinner angle will make it less obscured.

Ripspeed Black Stretch Grid Competition Mesh - Link via Halfords - £24.99
Loctite Glue Gun - Link via Halfords - £9.99
Halfords Cable Ties - Link via Halfords - £2.79
General tools - Hex Sockets/Screw Drivers/Pliers/Wire Cutters (I used Scissors :lol: )
Gloves - optional
Soft Sheet to sit the bumper on - I also used a foam mat to sit the bumper on as pictured below
Step 1:
Remove your front bumper as described on page 20-87 of the RSX Manual here: RSX Workshop Manual
I recommend the help of another person to remove it and put it back on to avoid any potential paint damage.
Step 2:
Cut your mesh to the required size to overlap both the top and bottom of the bumpers radiator vent, then you will want to secure this using 3 small cable ties in the locations pictured (on both sides and one in the middle on the top of the middle post) including using your glue gun to secure the bottom half of the mesh to the plastic of the bumper.
Please Note: The cable ties I used were a VERY tight fit and very fiddly!
Step 3 - Brake Ducts
Unscrew the fixings of the Brake Ducts on the inside of the bumper, there are 7 screws in total. 4 screws hold the duct onto the bumper (outside edge) and 3 hold the face of the duct on (inside edge) Pictured below.
The duct on the outside of the bumper (pictured above) will fall out when you unscrew the 3 screws on the inside edge of the holder, which in turn, will reveal the old mesh which is stapled to the inside. Remove the staples with your pliers and the old mesh (chicken wire!) will fall out.
Using the old mesh as a template, trim your new mesh to the correct size and make sure you cut holes where the Duct face posts insert.
Step 4
Put your Brake Ducts back together the same way you took them off! Providing you did a perfect fit, you wont have needed to re-staple the mesh to the holder.
They should now look like this, happy days! :lol:
Step 5
Put your bumper back on in the reverse order of how you took it off, make sure you have someone to help you and TAKE YOUR TIME!
Please note: The plastic covers underneath the car need to go back exactly how they were before. Mine were on the outside of the bumper, they need to be positioned inside! and the arch linings will also be a bit of a problem and need to be guided back behind the sides of the bumper.
Step 6
Admire! yes, you car now looks completely badass! :lol: Treat yourself to a Cold Drink, or like I did, compliment with a big fat dirty Chinese Takeaway! :lol:
Hope this little guide helps anyone wishing to do the same!
SPECIAL NOTE:
The mesh will look different from different angles, I made sure the mesh looked 'thicker' from eye level. Please be aware of this as you will want all the mesh on your car to match!
Thicker angle will make your radiator more obscured (my option), the thinner angle will make it less obscured.
