
Hi,
So after hours of looking for a how 2 guide and not finding one, I have now done one for you all 8)
This How 2 will show how to Install a SuperPro rear upper and lower polyurethane bush kits, I take no responsibility for any damages that may occur by following this guide, the kits ''do not'' come with instructions so use this as a guide only!
The SuperPro bushes are manufactured by Fulcrum Suspensions in Brisbane Australia, they have been designed for the base RSX-S model but they do also work very well for the DC5 too.
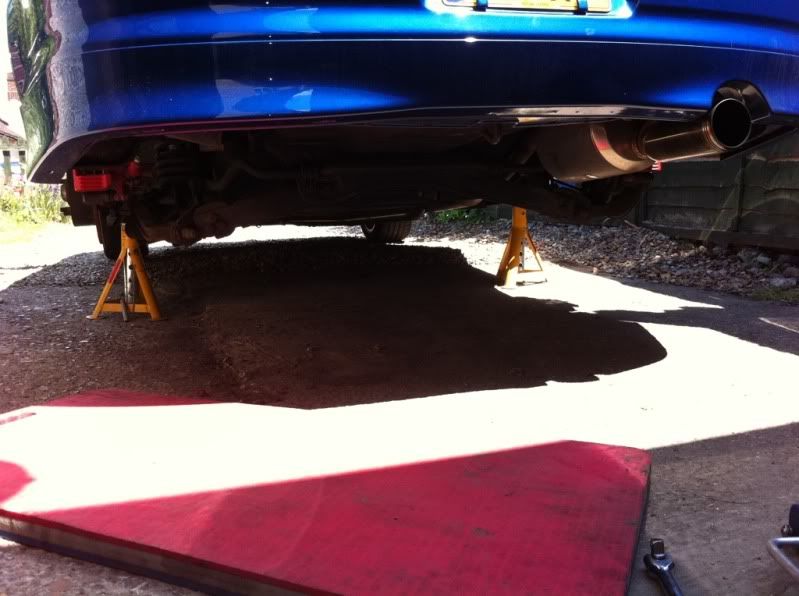
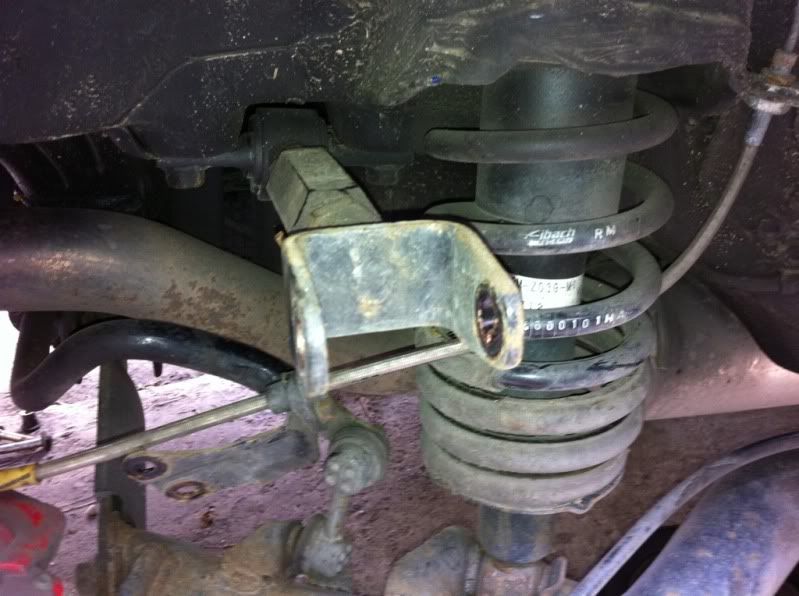
So the first step is to jack the car up and place 2 axle stands under the car. Then remove both wheels and place a jack under the lower control arm to support it.
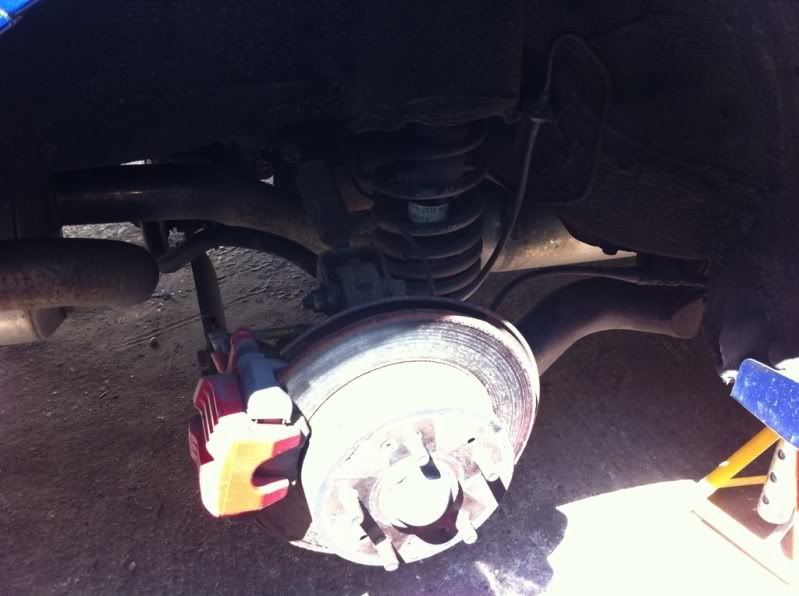
Then remove the brake callipers and mounting brackets that hold the hoses and handbrake cable, then remove the brake disks.
Now remove the ABS sensor if you can, but it is VERY tight. I didn't remove it, instead I unbolted the wiring harness and unplugged the sensors from the cars wiring harness plug. The drivers side is under the rear seat and goes into the car through a black grommet from the underside. The passenger side plug is under the car, just next to the petrol tank.
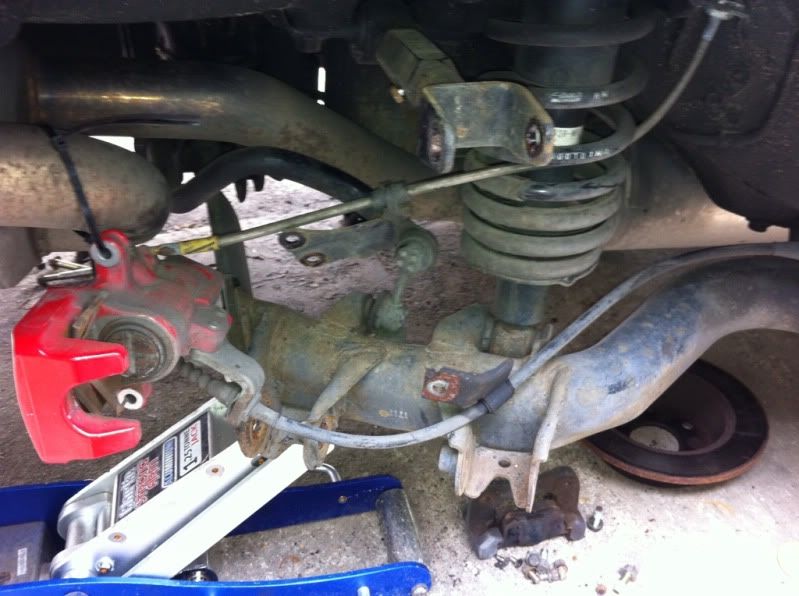
Once all the wires and brackets are removed from the hubs, the 2 lower arm bolts and 1 upper bolt can be removed. Remember to support the lower wishbone with a jack.
Once the bolts are removed, pass the hub through the brake hose and handbrake cables that are still attached to the calliper. Remember these do not need to be removed!!

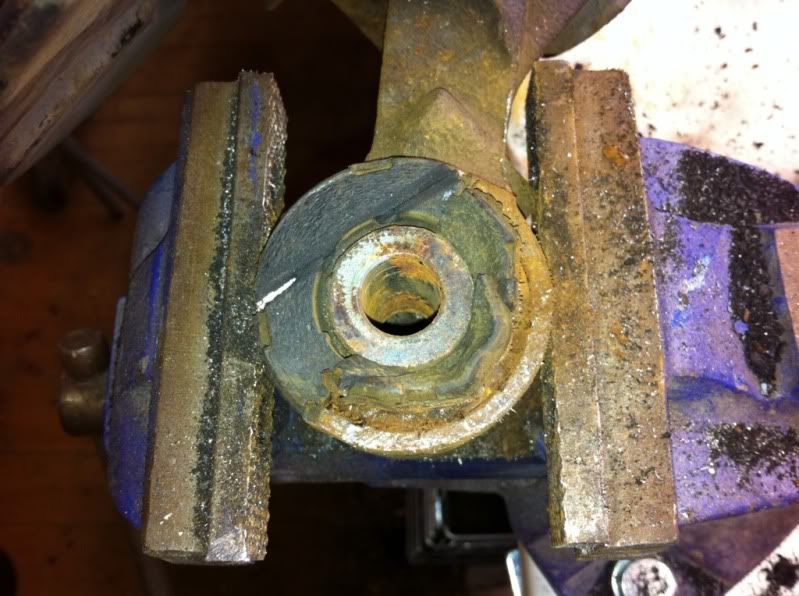
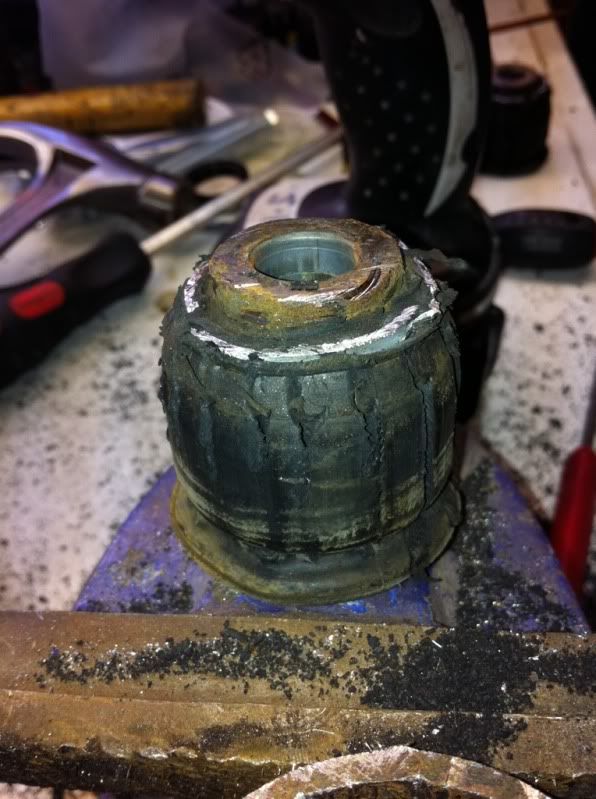
Take the hub and hold it firmly in a bench vice.
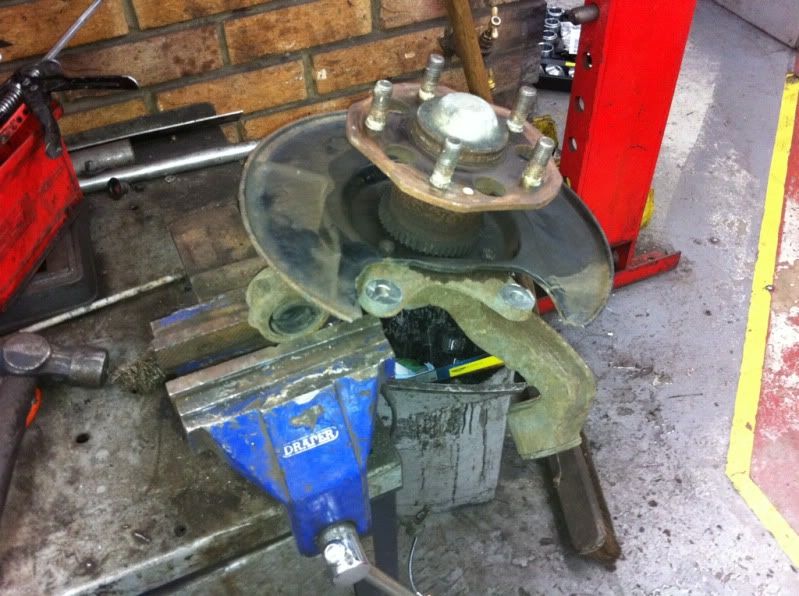
The following method for removing the top bushes is the best method I found.
You will need a Press and a compression screw to remove the 3 OEM bushes. A press is no use for the lower 2 bushes as the hub will not fit.
Top mount
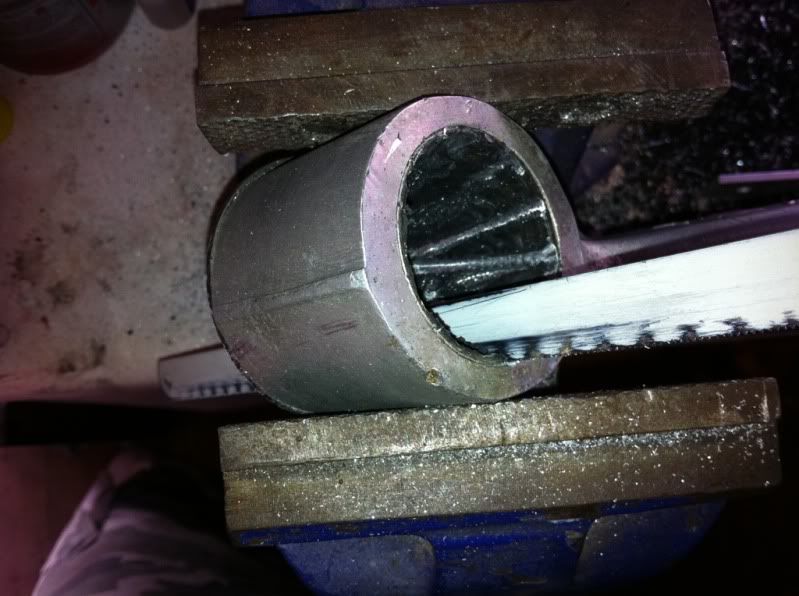
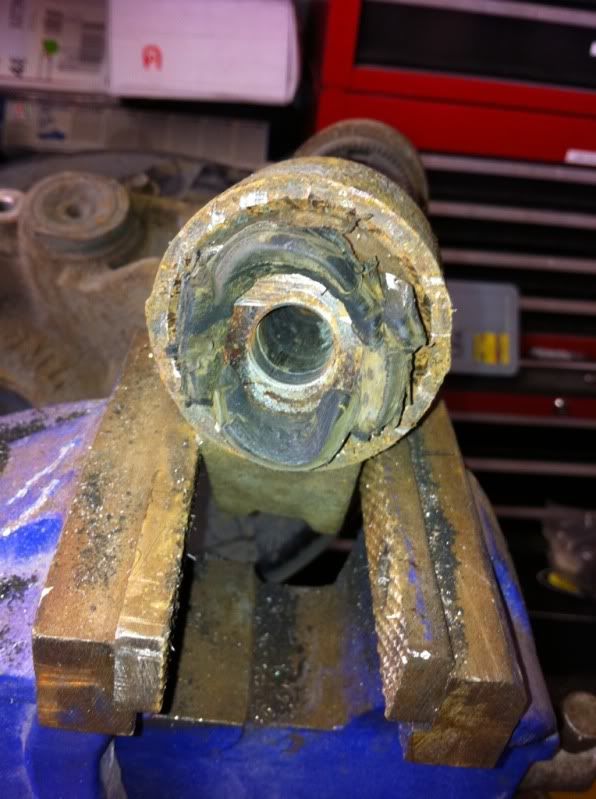
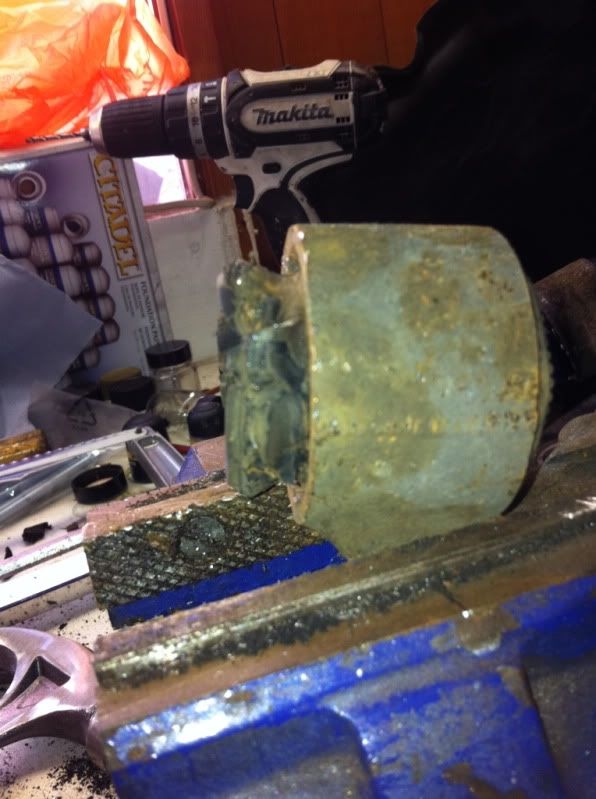
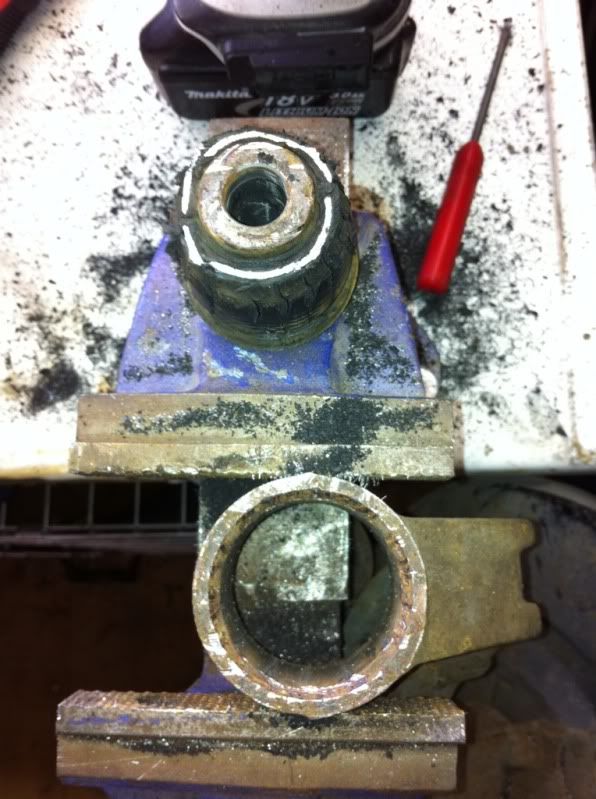
The first job is to force the centre out of the top bush with the help of the press. If you do not have access to one, use a hand drill with a 5mm drill bit and drill holes around the centre metal tube in the rubber to weaken it. Then use a pair of grips to rip the rubber out.
I Then used a hack saw to cut the metal outer of the old bush. Then I used a hammer to knock it out of the hub. (This is a picture from the front wishbone but is the same process)
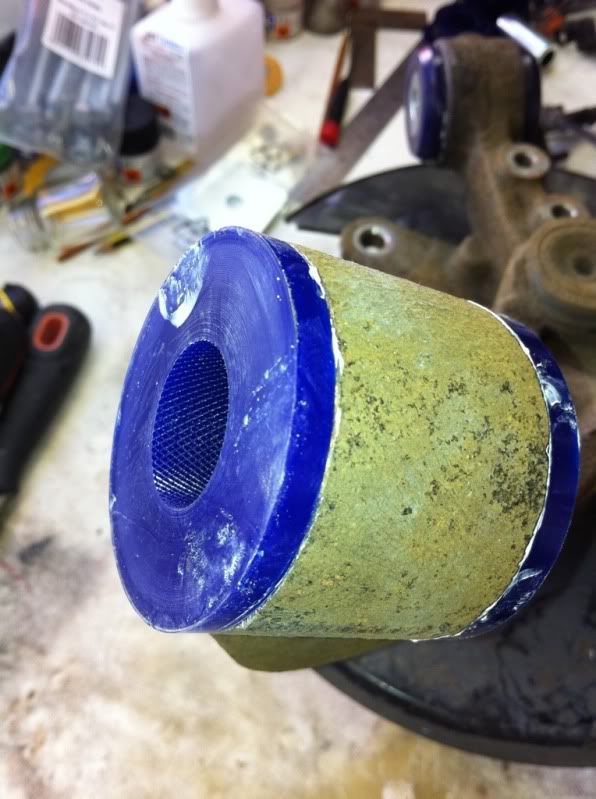
The new upper bushes have a lip on both sides that makes it harder to get them into the hub. Using the supplied grease, coat the internal surface of the hub and the new bushes.
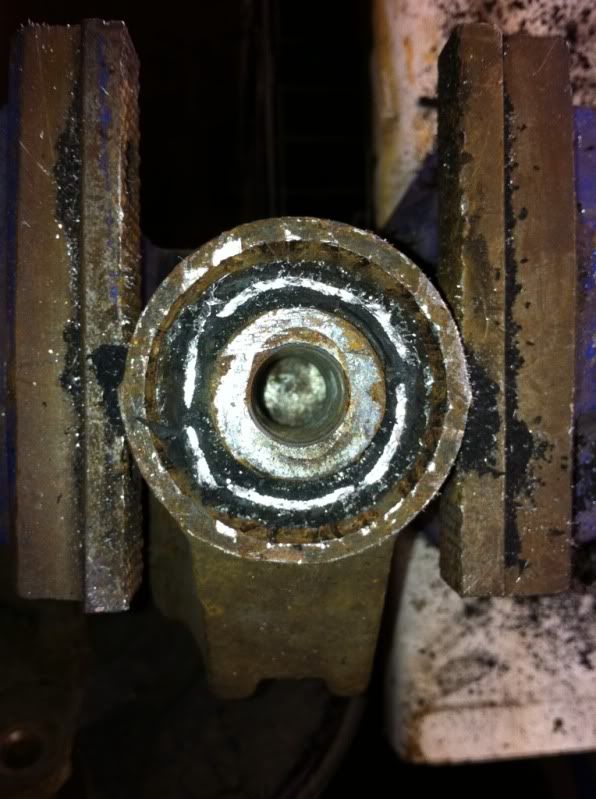
Then using a compression screw force the new bushes into the hub. Once in the hub, coat the metal sleeve with the grease and insert it into the new bush.
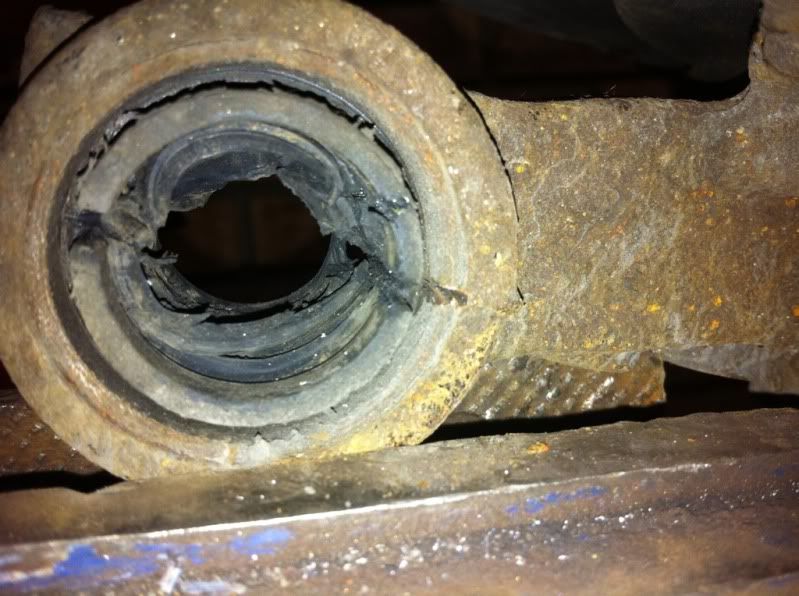
Bottom Bushes.
The 2 lower bushes are a right pain the back side! The angle of them means that they can not be put under a press so I had to resort to drilling the bushes out with a 4mm drill bit too weaken the rubber.
The first thing that needs doing in order to gain access to the rubber is to cut into the metal top collars and fold up the metal lip all around the bush like below.
This is so you can get a 4mm drill bit between the outer hub steel casting and the inner bush. once happy drill away.
once happy, use a long reach socket and place it onto the bush centre where the bolt would go and using a mallet, knock the bush out of the hub.
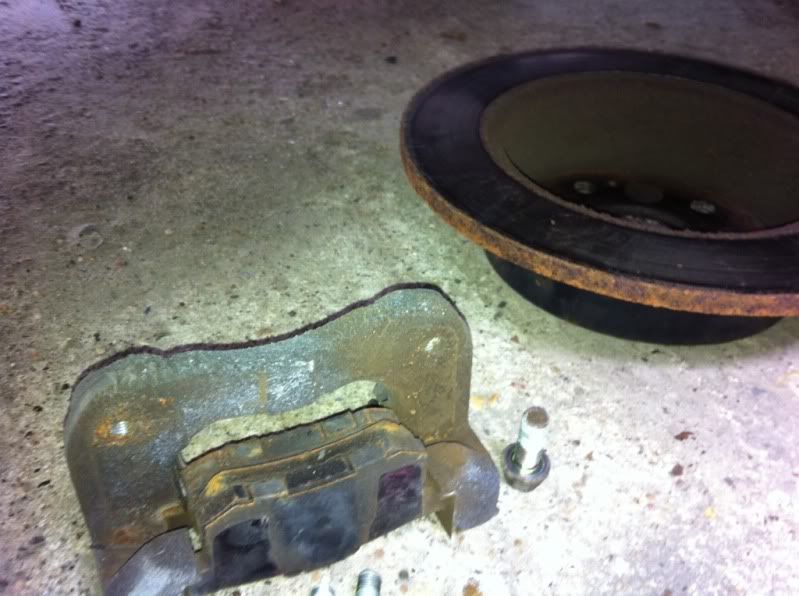
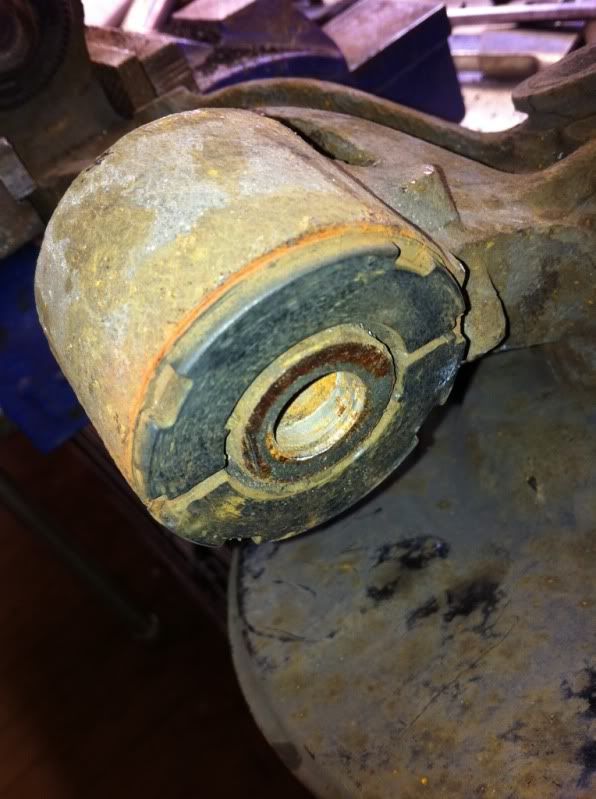
These bottom bushes do not have a metal outer casing, so there is no need to cut them with a hacksaw!! Result! 8)
Now for the fun part!
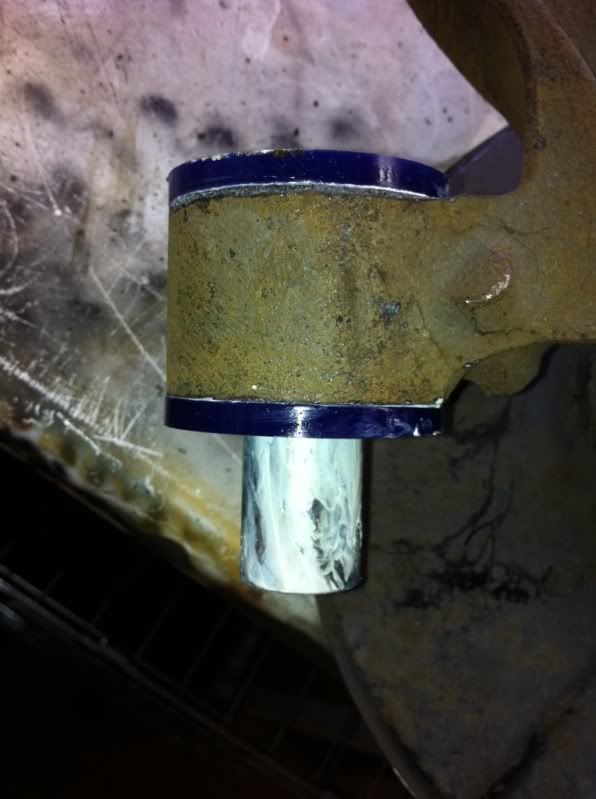
The lower bushes are easy to install as they are in 2 pieces per bush. Again lubricate both hub holes and bushes and slide the polyurethane bushes into the hub by hand.
Using the supplied grease, Lubricate the inside of the bushes and the metal pivot tube and using the bench vice press them in.


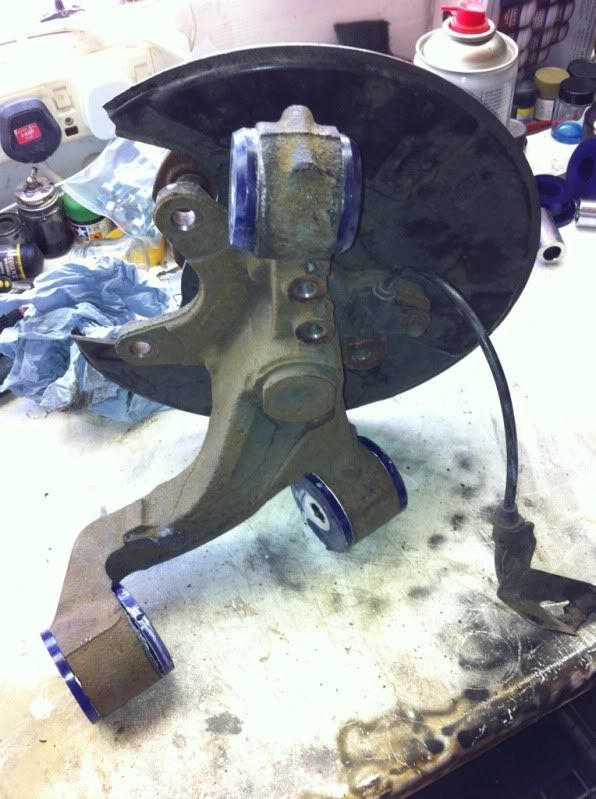
Done!!
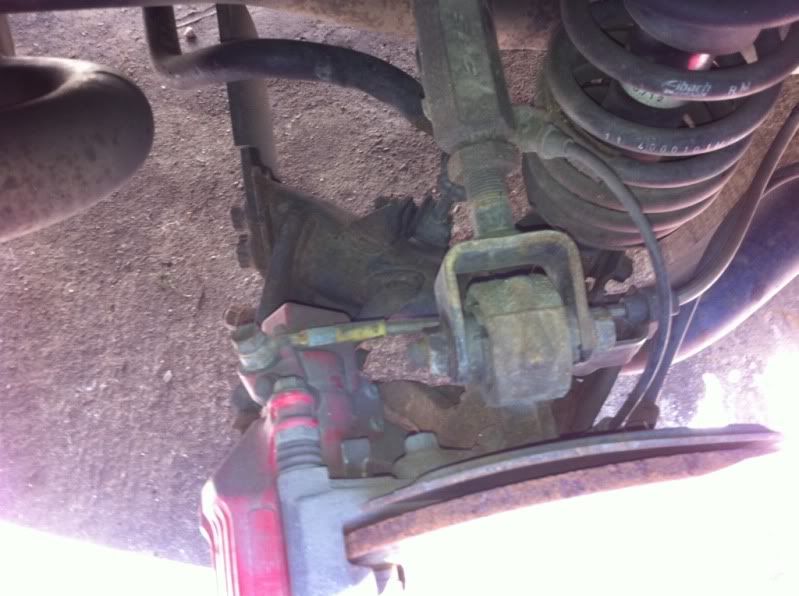
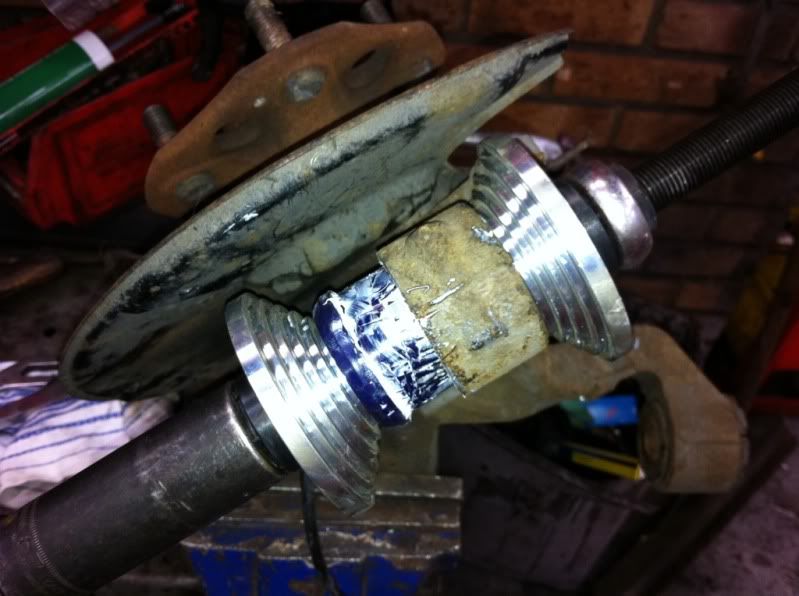
Now re-install the hubs onto the car. Before Tightening the bolts up to spec, place a jack under the lower wishbone so it takes the weight of the car. Then torque the bolts up to the specs in the Honda service manual.
First plug the ABS sensor back in and bolt the wiring harness back into place.
Re-install the brake disks and then the brake callipers along with the hand brake mounting brackets and finally the brake hose.
Put the wheels back onto the car, lower the car onto the ground and tighten the wheel nuts
Your done!
A Geometry test will be required as the new bushes are very hard compared to the old soft bushes. It was amazing how much mine was out after the alignment!!
Hope this helps,
James.
So after hours of looking for a how 2 guide and not finding one, I have now done one for you all 8)
This How 2 will show how to Install a SuperPro rear upper and lower polyurethane bush kits, I take no responsibility for any damages that may occur by following this guide, the kits ''do not'' come with instructions so use this as a guide only!
The SuperPro bushes are manufactured by Fulcrum Suspensions in Brisbane Australia, they have been designed for the base RSX-S model but they do also work very well for the DC5 too.
So the first step is to jack the car up and place 2 axle stands under the car. Then remove both wheels and place a jack under the lower control arm to support it.
Then remove the brake callipers and mounting brackets that hold the hoses and handbrake cable, then remove the brake disks.
Now remove the ABS sensor if you can, but it is VERY tight. I didn't remove it, instead I unbolted the wiring harness and unplugged the sensors from the cars wiring harness plug. The drivers side is under the rear seat and goes into the car through a black grommet from the underside. The passenger side plug is under the car, just next to the petrol tank.
Once all the wires and brackets are removed from the hubs, the 2 lower arm bolts and 1 upper bolt can be removed. Remember to support the lower wishbone with a jack.
Once the bolts are removed, pass the hub through the brake hose and handbrake cables that are still attached to the calliper. Remember these do not need to be removed!!
Take the hub and hold it firmly in a bench vice.
The following method for removing the top bushes is the best method I found.
You will need a Press and a compression screw to remove the 3 OEM bushes. A press is no use for the lower 2 bushes as the hub will not fit.
Top mount
The first job is to force the centre out of the top bush with the help of the press. If you do not have access to one, use a hand drill with a 5mm drill bit and drill holes around the centre metal tube in the rubber to weaken it. Then use a pair of grips to rip the rubber out.
I Then used a hack saw to cut the metal outer of the old bush. Then I used a hammer to knock it out of the hub. (This is a picture from the front wishbone but is the same process)
The new upper bushes have a lip on both sides that makes it harder to get them into the hub. Using the supplied grease, coat the internal surface of the hub and the new bushes.
Then using a compression screw force the new bushes into the hub. Once in the hub, coat the metal sleeve with the grease and insert it into the new bush.
Bottom Bushes.
The 2 lower bushes are a right pain the back side! The angle of them means that they can not be put under a press so I had to resort to drilling the bushes out with a 4mm drill bit too weaken the rubber.
The first thing that needs doing in order to gain access to the rubber is to cut into the metal top collars and fold up the metal lip all around the bush like below.
This is so you can get a 4mm drill bit between the outer hub steel casting and the inner bush. once happy drill away.
once happy, use a long reach socket and place it onto the bush centre where the bolt would go and using a mallet, knock the bush out of the hub.
These bottom bushes do not have a metal outer casing, so there is no need to cut them with a hacksaw!! Result! 8)
Now for the fun part!
The lower bushes are easy to install as they are in 2 pieces per bush. Again lubricate both hub holes and bushes and slide the polyurethane bushes into the hub by hand.
Using the supplied grease, Lubricate the inside of the bushes and the metal pivot tube and using the bench vice press them in.
Done!!
Now re-install the hubs onto the car. Before Tightening the bolts up to spec, place a jack under the lower wishbone so it takes the weight of the car. Then torque the bolts up to the specs in the Honda service manual.
First plug the ABS sensor back in and bolt the wiring harness back into place.
Re-install the brake disks and then the brake callipers along with the hand brake mounting brackets and finally the brake hose.
Put the wheels back onto the car, lower the car onto the ground and tighten the wheel nuts
Your done!
A Geometry test will be required as the new bushes are very hard compared to the old soft bushes. It was amazing how much mine was out after the alignment!!
Hope this helps,
James.
")