
Rom
Advanced Member
- Messages
- 1,742
I dont think there is a guide for this, so thought id make one seeing as i was fitting them anyway. I fitted Powerflex inserts, listed for the EP3. These are about the same price as the engine inserts.
Now im going to assume you know some basics, how to jack the car, righty tighty lefty loosey etc") Also i dont have the standard airbox, so cant comment on that.
Also i dont have the standard airbox, so cant comment on that.
Tools Needed
10mm Spanner / Socket (Battery / Intake Hose)
8mm Socket (For my Mugen at least)
17mm Spanner / Socket (Mount Bolts)
Ratchet / Extension
Pliers (Breather Hose / Loom Clip)
17mm Deep Socket (can do without but helped)
Trolley Jack
Time wise, id say about an hour. Took me about 45 mins, whilst taking pics, but i had a impact gun, and about 12 years of being a tech.
You dont actually need to jack the car up, i did, as i will be doing the other mounts this week, and to save me stooping over so much.
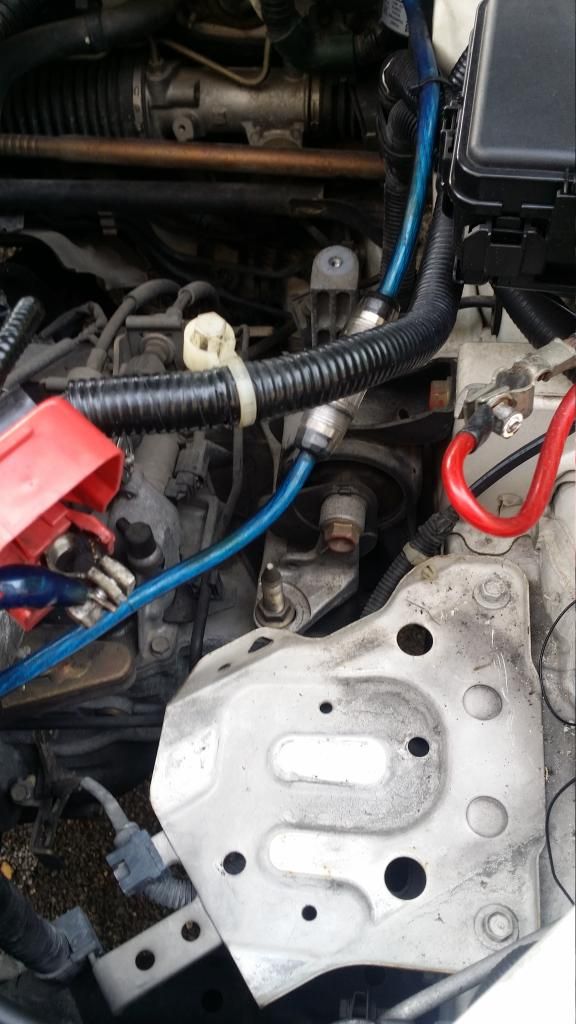
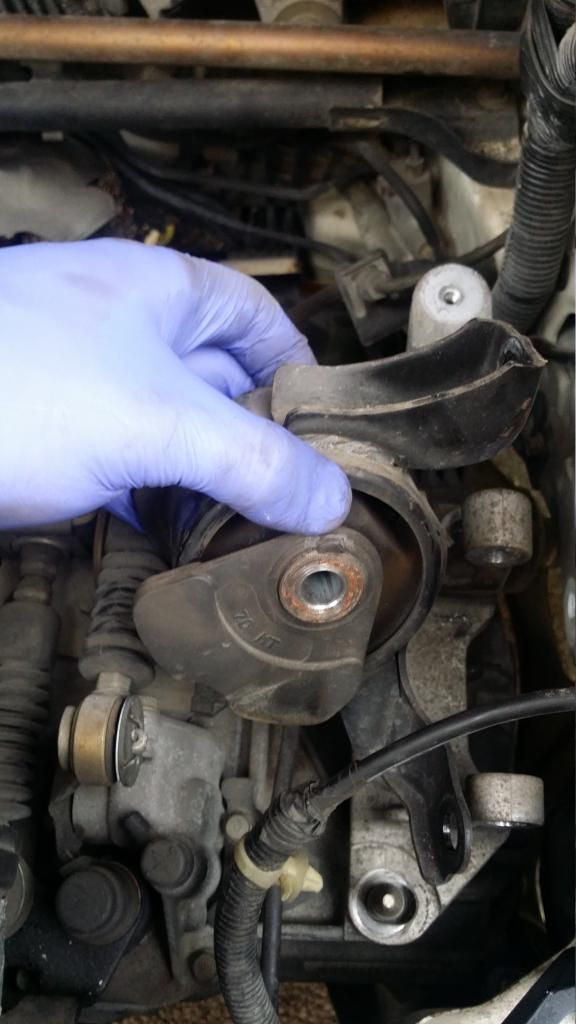
So from the top, you need to remove the battery and airbox to access the mount. Then you can see the mount
Now you need to put a jack under the gearbox. Id advise a rubber pad, or block of wood on the jack to be safe. Jack it up to just take the weight a bit.
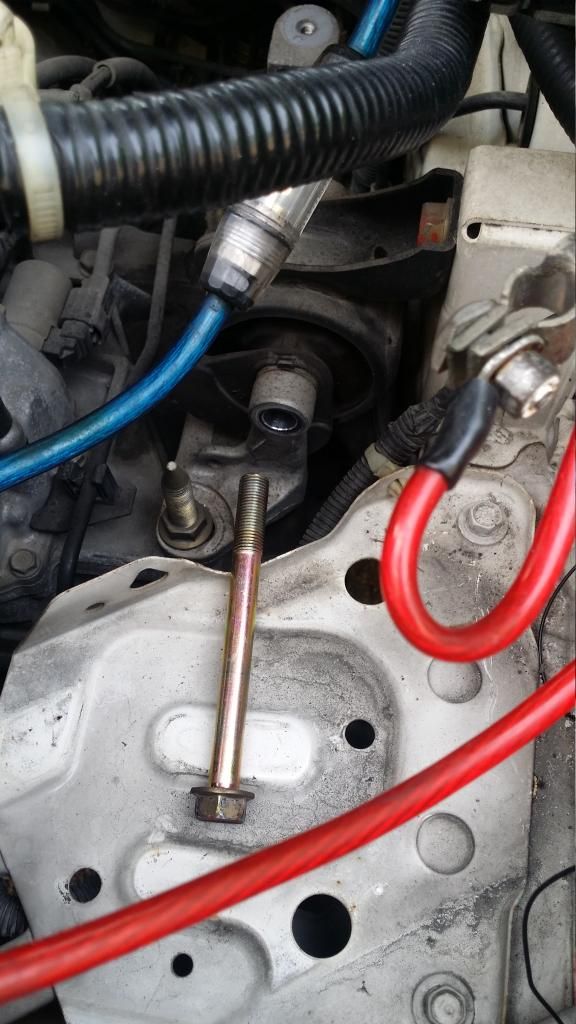
Now remove the long 17mm bolt through the centre of the mount.
The jack is now taking the weight, the mount should be slack. Though even letting the jack down, the actual box drops very little, the other mounts stop it moving much.
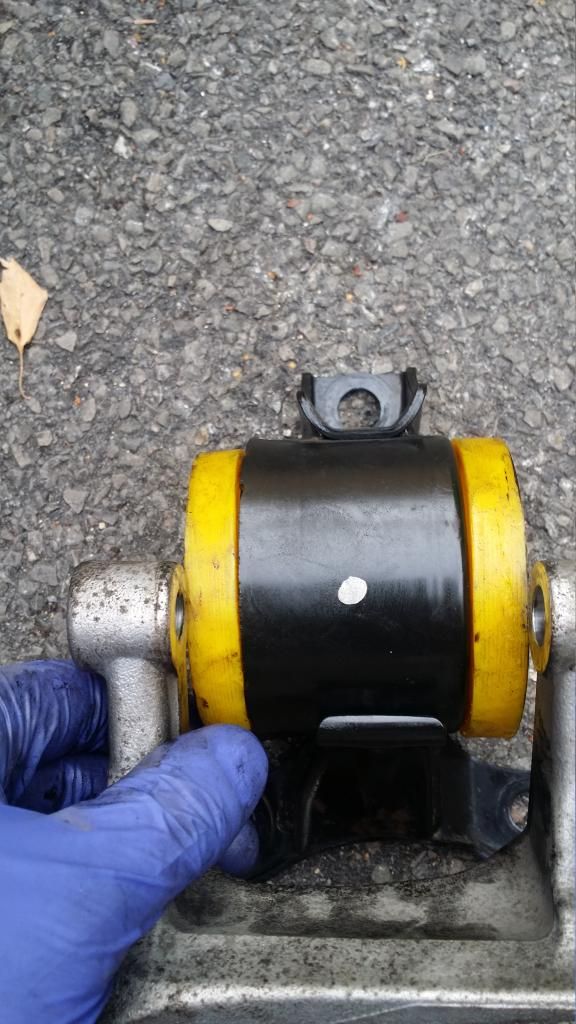
So now you need to take the mount off the chassis leg.
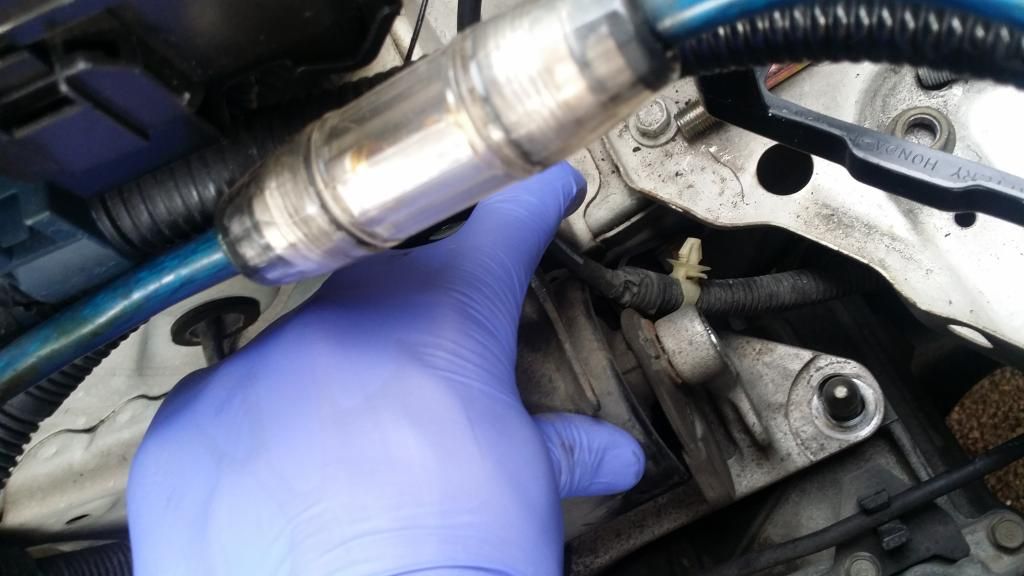
First remove this clip from the battery tray, so the cable can be moved aside. Just pinch the back together with a pair of pliers.
This step is optional, i did it as i thought i might be able to fit the inserts this way. You cant. But it did make getting on the other bolts slightly easier, and also made offering the mount up to check the fit easier.
If you want, remove the 2 17mm nuts, and 1 17mm bolt from the silver mount thats bolted to the gearbox.
Now remove the 3 17mm bolts from the black part of the mount. The lower 2 can probably be reached from underneath, if you remove the arch liner. But the top was simple enough, so unless you cant get enough leverage, this way is fine.
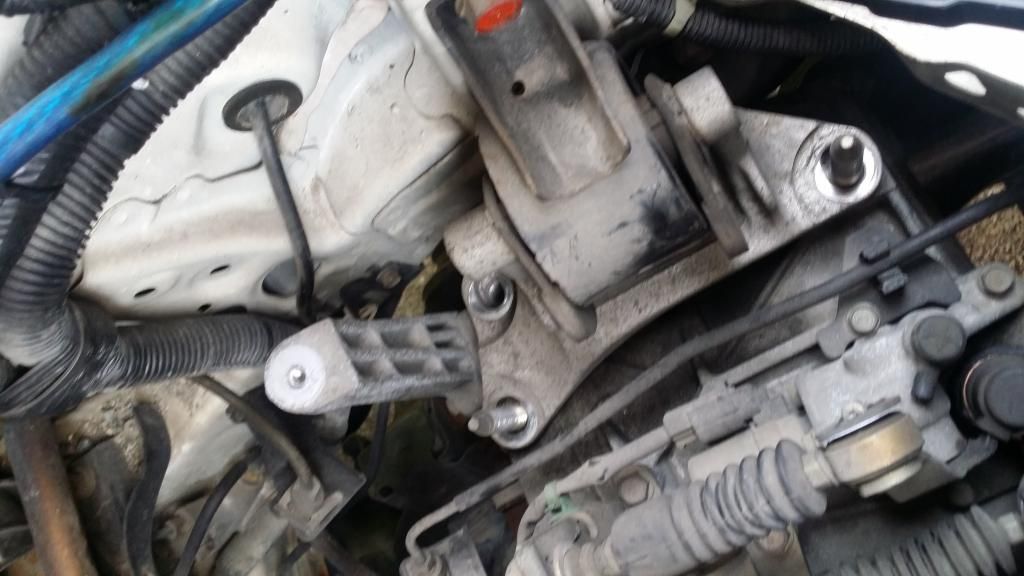
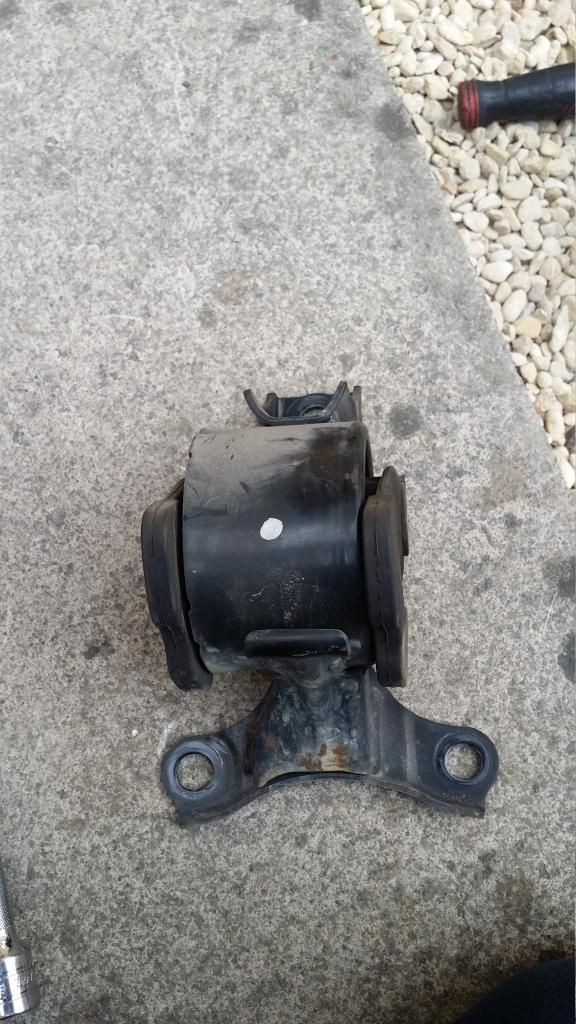
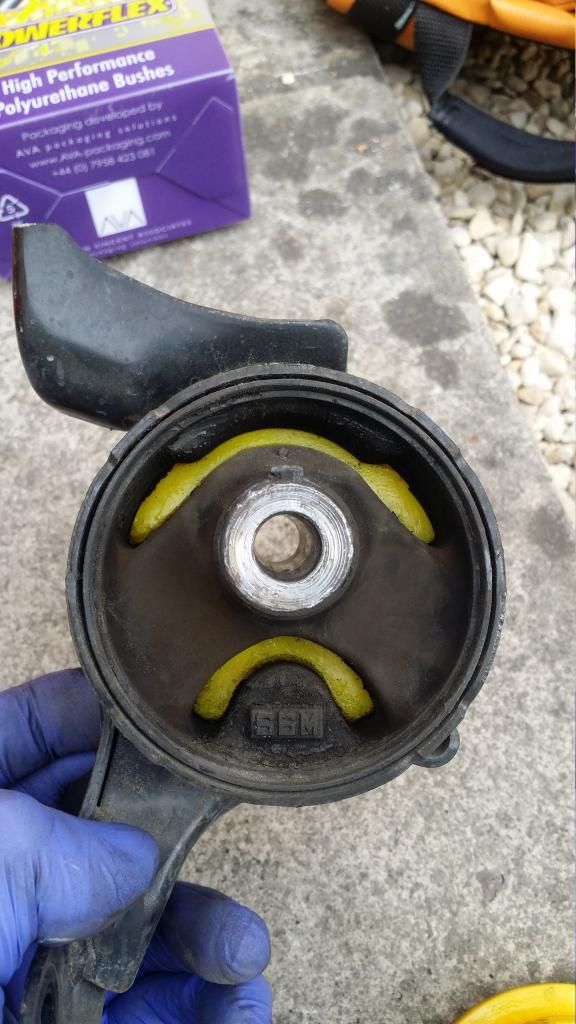
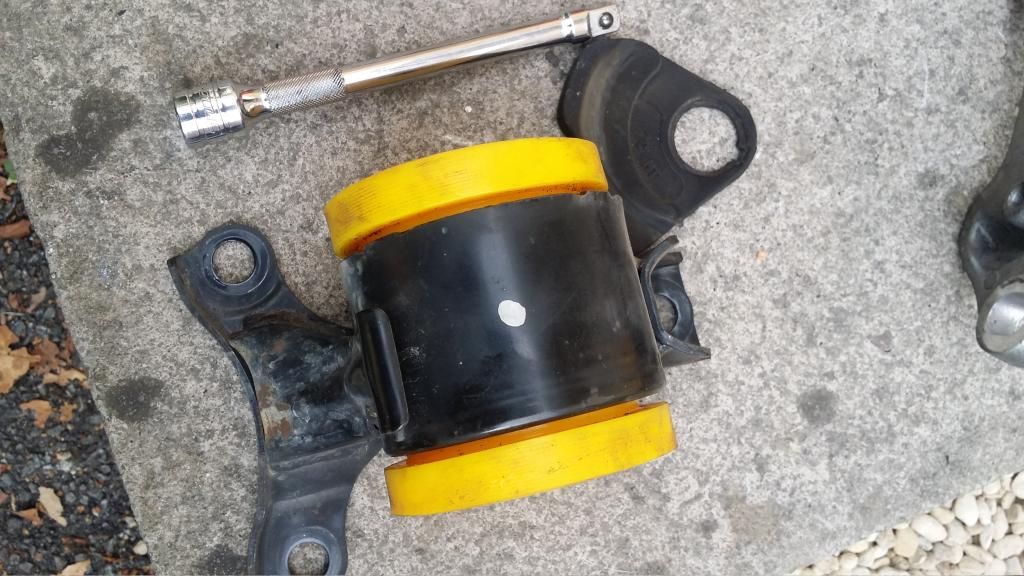
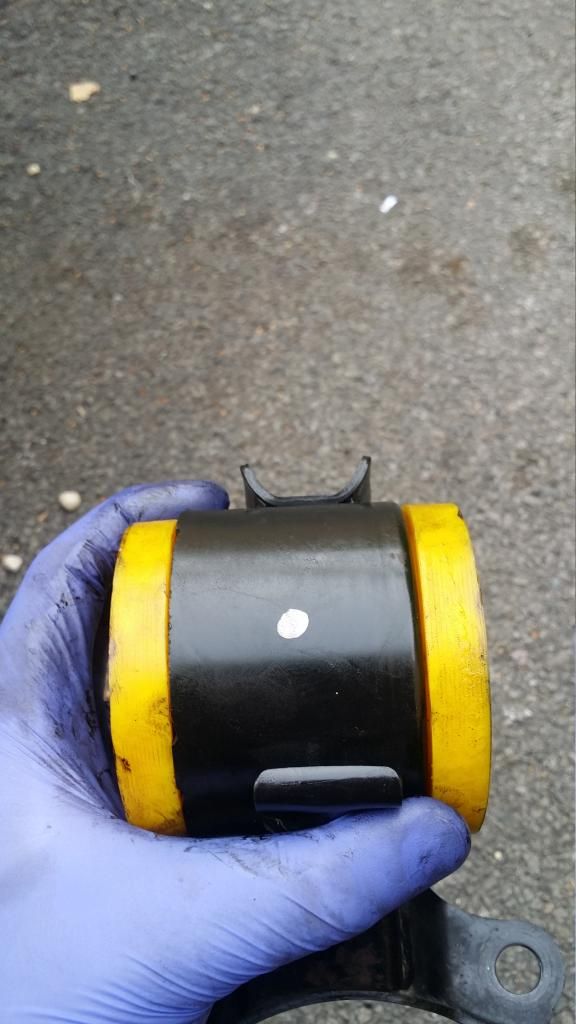
You should now have the mount off the car, and looking like this
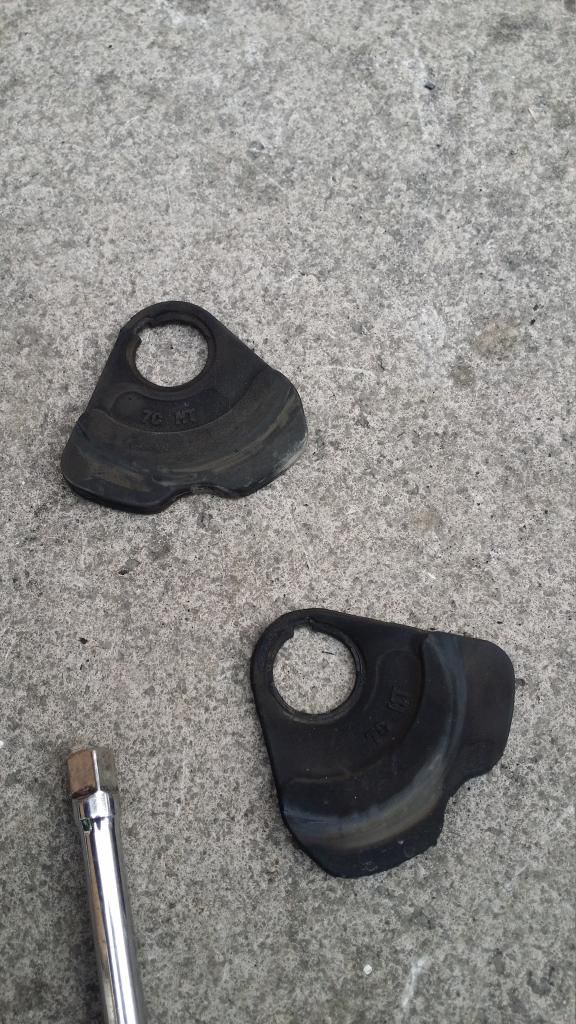
Pop these bits off each side of the mount
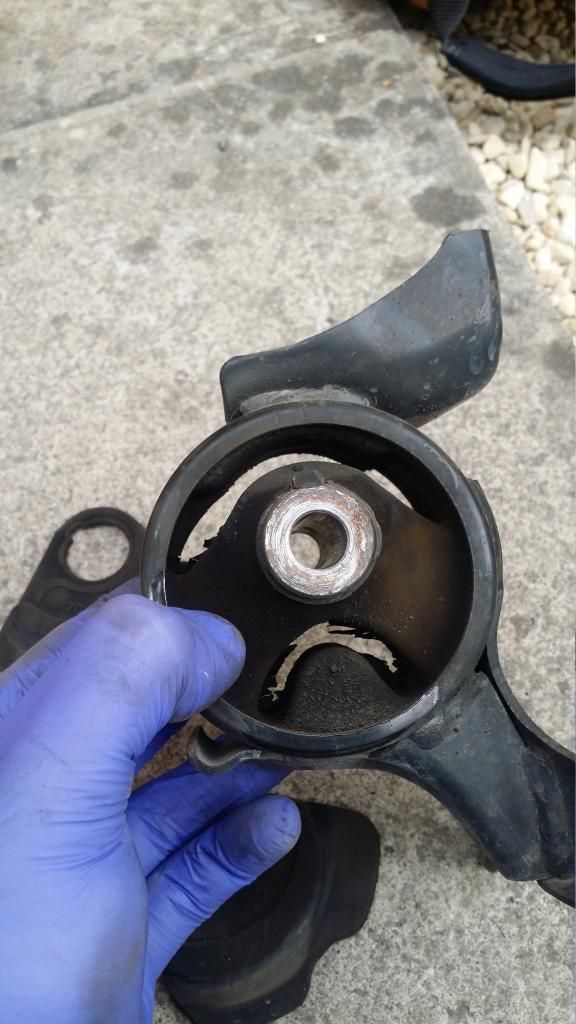
Now your mount should look like this
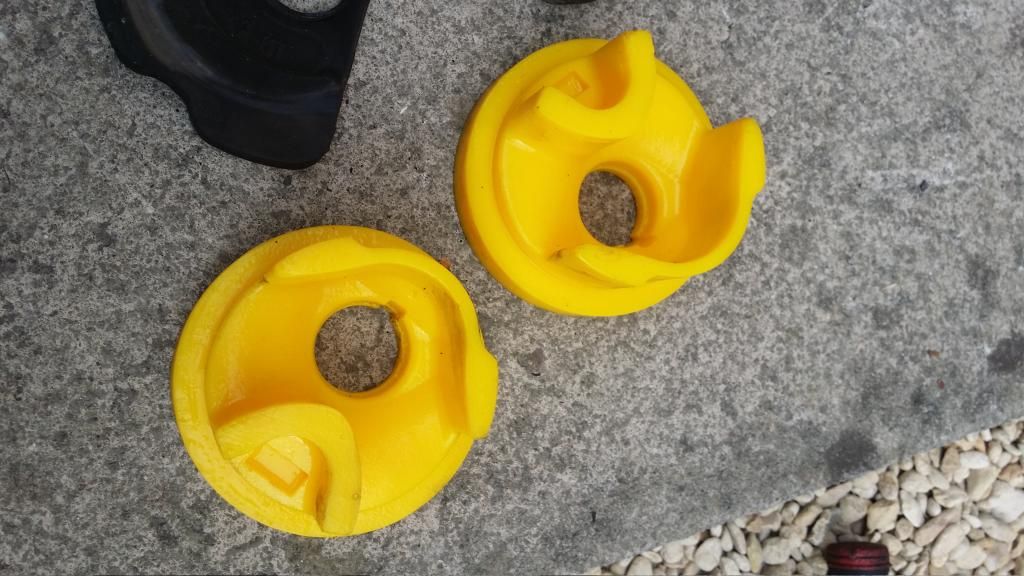
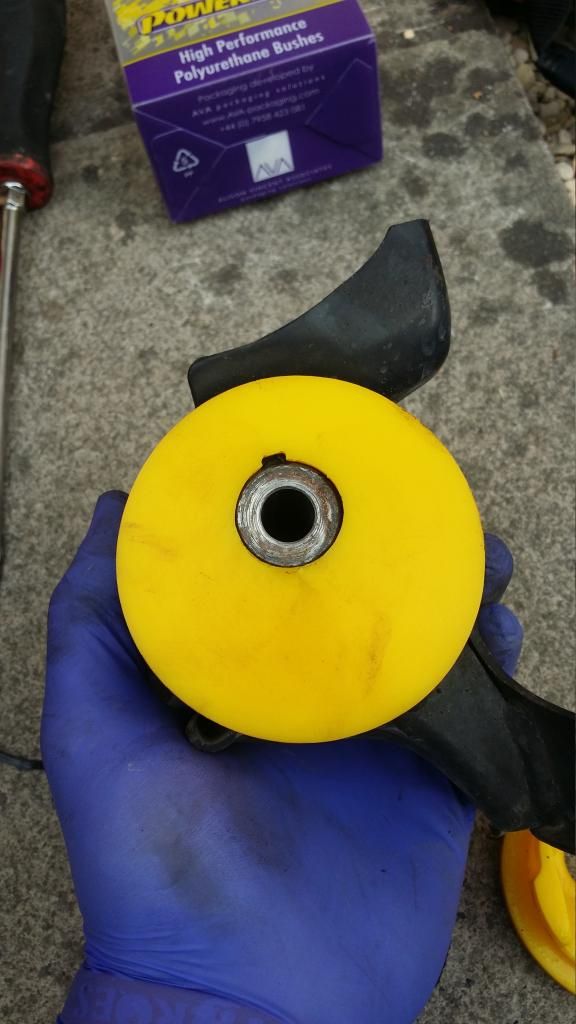
Get your new inserts out
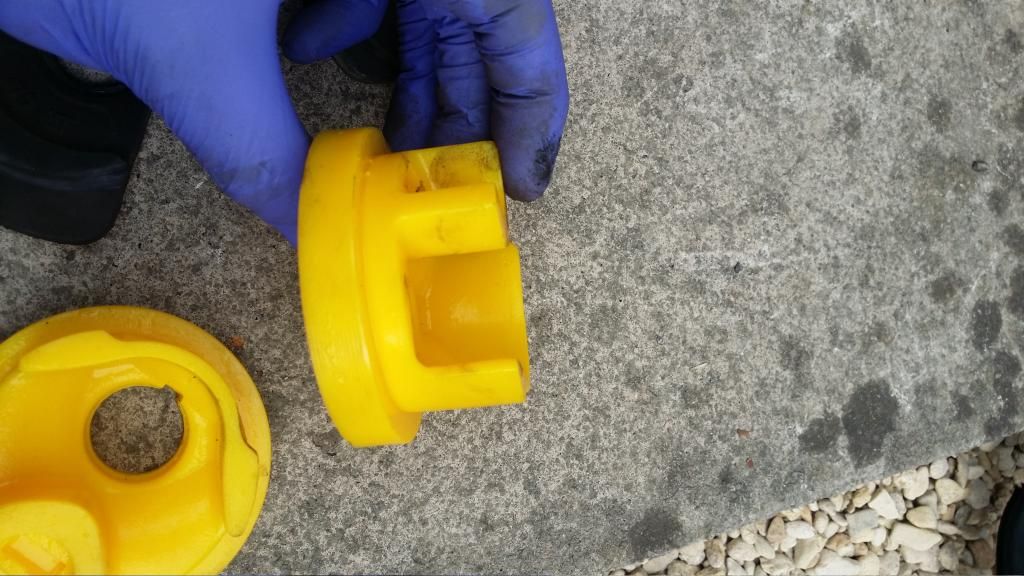
Before greasing them (there is a very small sachet of grease supplied), test fit them into the mount
This is how mine looked once both pushed in as far as they would go.
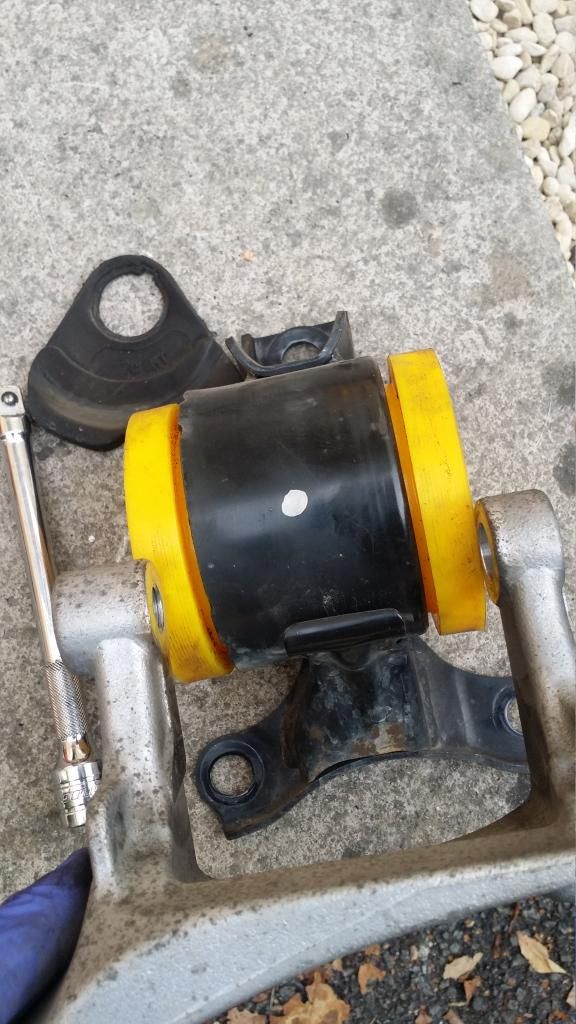
The mounts were fouling each other inside, meaning the gap was quite big either side. Fitting it back in place with the other mount looked tight. It would go, but i thought it may end up making a noise, and just wasnt happy with how they sat
Now i dont know if this is intentional, as i had no instructions. But there is a line / mould line on the mounts.
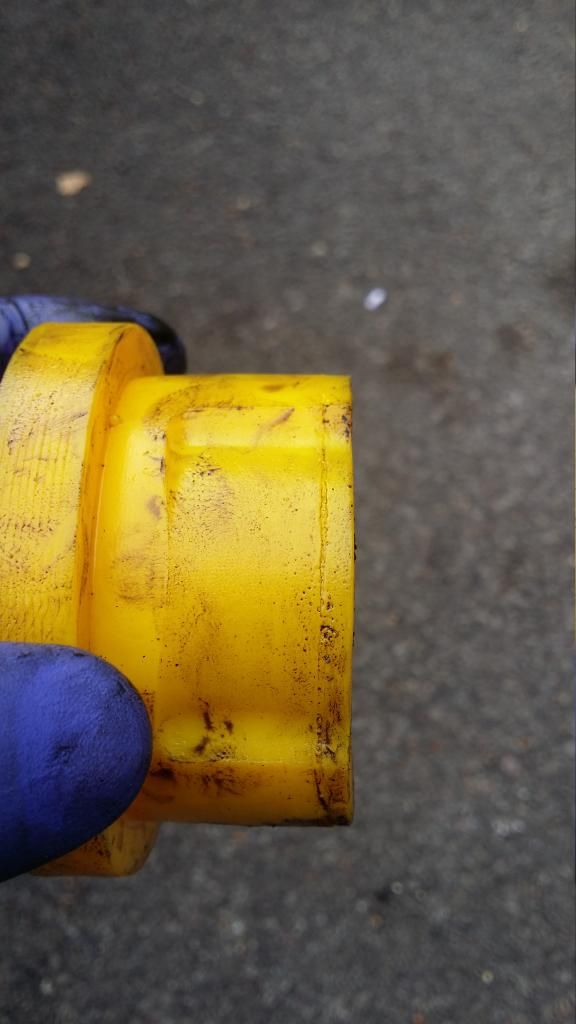
So i cut along the line, on one insert only, the small and large part both have this line. I cut the small and large parts along the line on 1 insert. But i still wasnt happy with the clearance, so ended up trimming both inserts, the small and large parts.
The fit was now much better.
Still a snug fit on the other mount
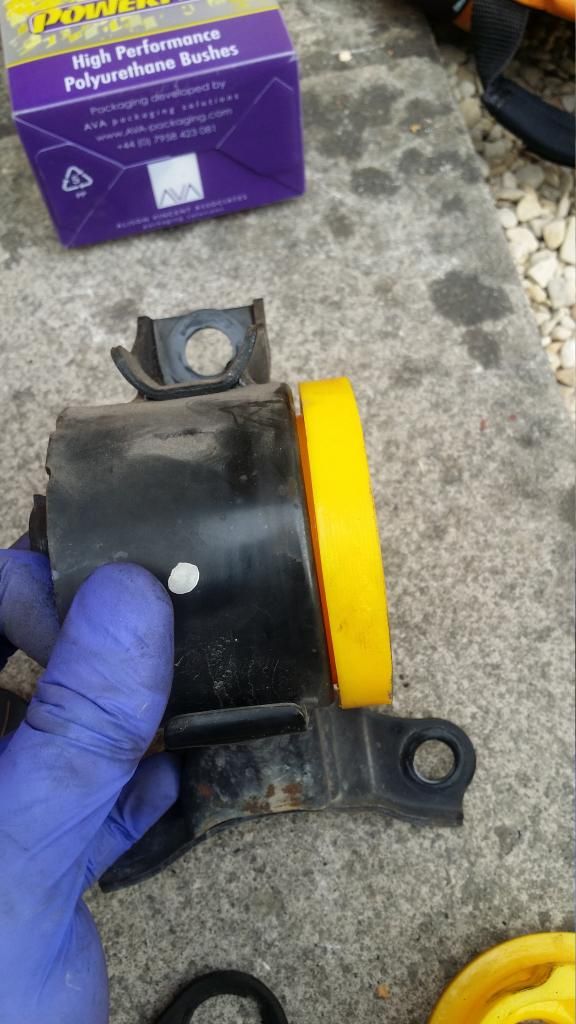
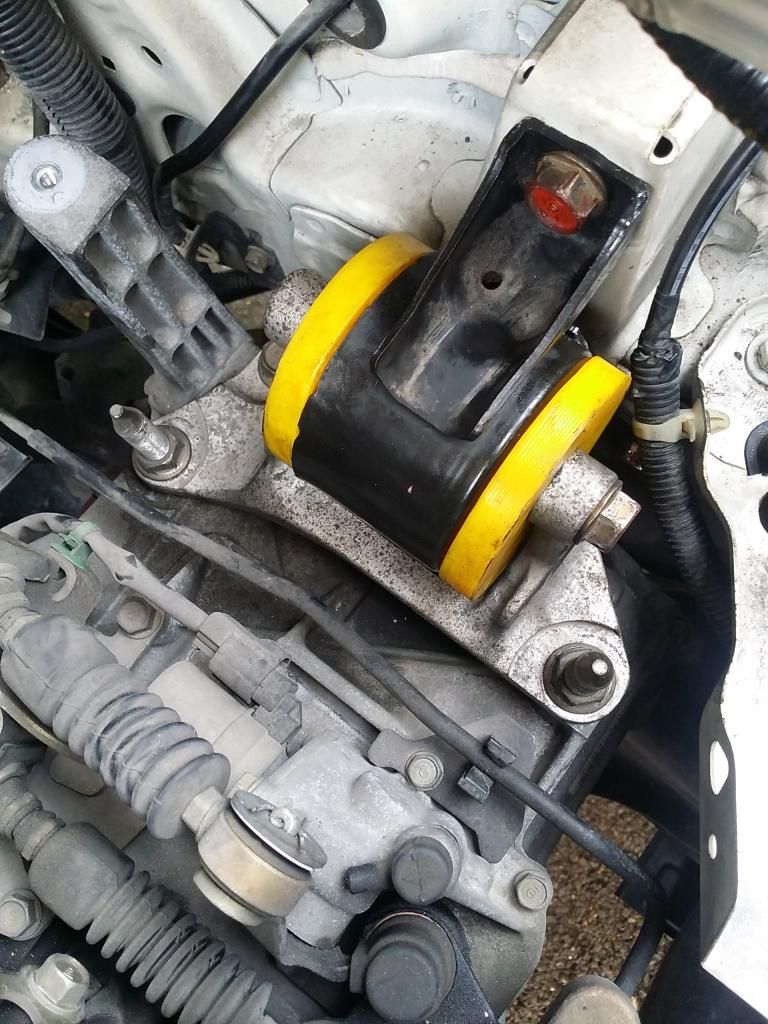
Now i greased the inserts, refitted them, and refitted the mounts. Refitting is just a reverse process. Heres how it should look after refitting.
Enjoy
Now im going to assume you know some basics, how to jack the car, righty tighty lefty loosey etc
Also i dont have the standard airbox, so cant comment on that.Tools Needed
10mm Spanner / Socket (Battery / Intake Hose)
8mm Socket (For my Mugen at least)
17mm Spanner / Socket (Mount Bolts)
Ratchet / Extension
Pliers (Breather Hose / Loom Clip)
17mm Deep Socket (can do without but helped)
Trolley Jack
Time wise, id say about an hour. Took me about 45 mins, whilst taking pics, but i had a impact gun, and about 12 years of being a tech.
You dont actually need to jack the car up, i did, as i will be doing the other mounts this week, and to save me stooping over so much.
So from the top, you need to remove the battery and airbox to access the mount. Then you can see the mount
Now you need to put a jack under the gearbox. Id advise a rubber pad, or block of wood on the jack to be safe. Jack it up to just take the weight a bit.
Now remove the long 17mm bolt through the centre of the mount.
The jack is now taking the weight, the mount should be slack. Though even letting the jack down, the actual box drops very little, the other mounts stop it moving much.
So now you need to take the mount off the chassis leg.
First remove this clip from the battery tray, so the cable can be moved aside. Just pinch the back together with a pair of pliers.
This step is optional, i did it as i thought i might be able to fit the inserts this way. You cant. But it did make getting on the other bolts slightly easier, and also made offering the mount up to check the fit easier.
If you want, remove the 2 17mm nuts, and 1 17mm bolt from the silver mount thats bolted to the gearbox.
Now remove the 3 17mm bolts from the black part of the mount. The lower 2 can probably be reached from underneath, if you remove the arch liner. But the top was simple enough, so unless you cant get enough leverage, this way is fine.
You should now have the mount off the car, and looking like this
Pop these bits off each side of the mount
Now your mount should look like this
Get your new inserts out
Before greasing them (there is a very small sachet of grease supplied), test fit them into the mount
This is how mine looked once both pushed in as far as they would go.
The mounts were fouling each other inside, meaning the gap was quite big either side. Fitting it back in place with the other mount looked tight. It would go, but i thought it may end up making a noise, and just wasnt happy with how they sat
Now i dont know if this is intentional, as i had no instructions. But there is a line / mould line on the mounts.
So i cut along the line, on one insert only, the small and large part both have this line. I cut the small and large parts along the line on 1 insert. But i still wasnt happy with the clearance, so ended up trimming both inserts, the small and large parts.
The fit was now much better.
Still a snug fit on the other mount
Now i greased the inserts, refitted them, and refitted the mounts. Refitting is just a reverse process. Heres how it should look after refitting.
Enjoy