
Rom
Advanced Member
- Messages
- 1,742
I know a few of you have been interested in this. So thought id put a little guide together.
Ill start by saying, i DID NOT do this in situ. Obviously that would be easier, and ideal. But i couldnt budge my rack arms. Theres very little to get any leverage, and thats with a Buddyclub header. Probably even less with OEM.
If you have a 29mm Crows Foot, you can probably do this a lot easier in situ. But i dont, no one i know had one, and they cost a lot to buy for 1 job.
I also did this at home, so should be doable for everyone. Its obviously a bit more involved. But time wise, took me an hour to get the rack out. That includes taking the pictures, and my little girl 'helping'!
Id imagine 3 hours is probably a reasonable time if you follow this guide, for most people. Quicker if your handy with the steel ala Warren G")
Again, im going to assume you know how to jack a car up, have basic tools etc. Ill list anything essential.
Parts wise, i did buy new O Rings and lock washers. If im completely honest, i wouldnt bother if i did it again. But i couldnt find any decent info, so thought better safe than sorry.
I also dont torque anything. But ive years of working on cars behind me. Id advise you check the manual for torque settings if your not happy without them.
Tools Needed
29mm Spanner, or an adjustable will do.
A pipe clamp, or bolt to put in power steering supply hose.
17 and 14 mm spanners, capable of undoing pipe unions. Cheap ones can slip.
Cardboard, blanket, something to drape over the slam panel as you will be leaning on it. It hurts.
Some power steering fluid.
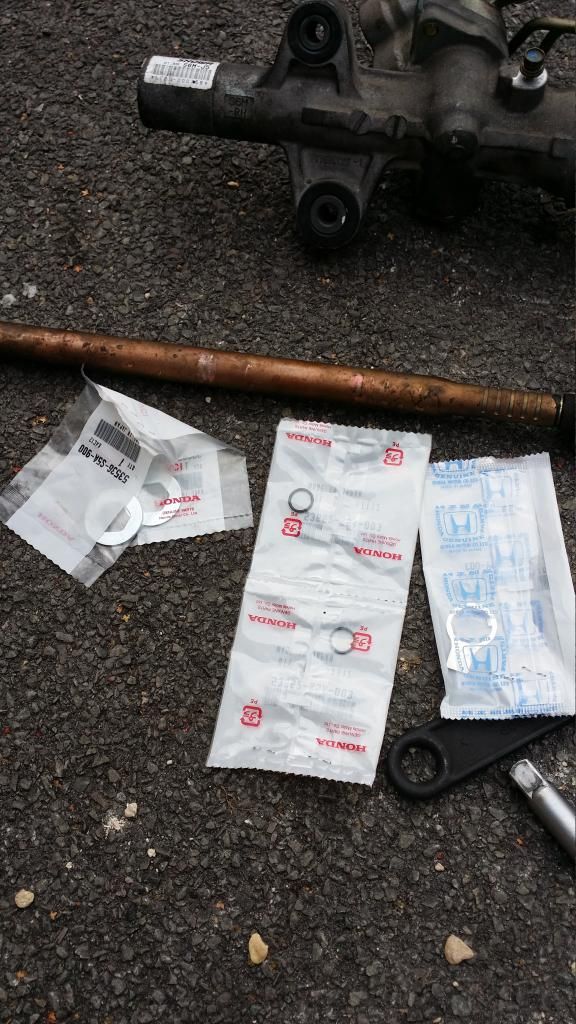
Parts i bought were
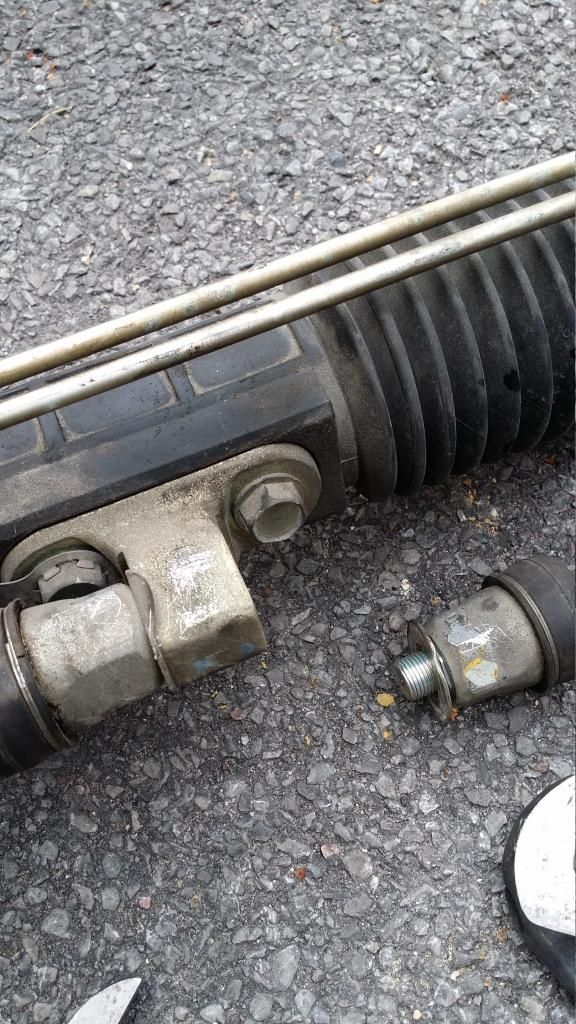
53535S5A003 Lock Washer x 1 If your careful, you can reuse. Part on the right
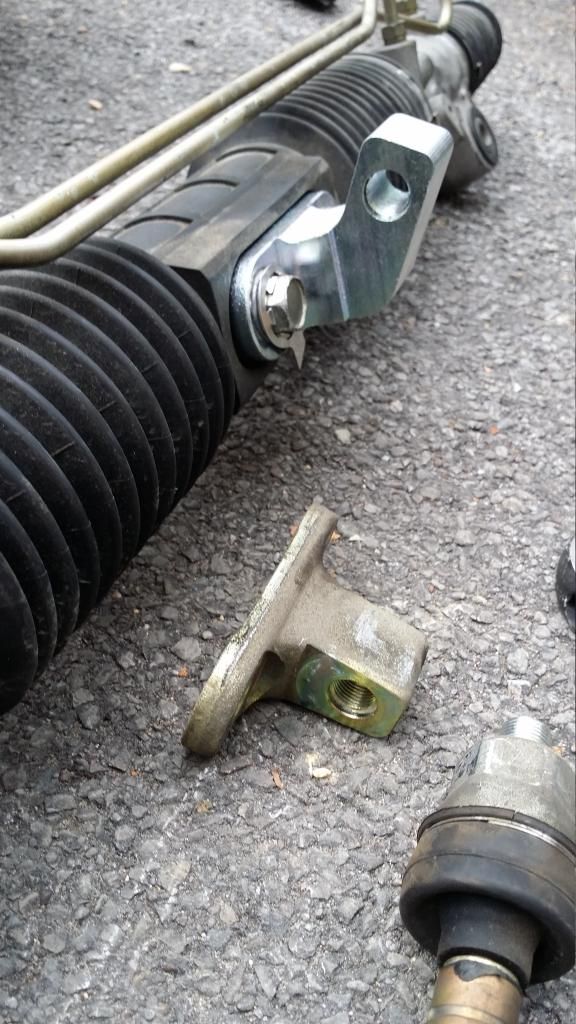
53662S5A003 O RIng x 2 Again, you could reuse these. The go on the bolts that hold the raiser to the rack. Centre in picture
53536S5A900 Washer x 2 These are bent over to secure the arm, you could spin and bend a different part over. Left in picture.
Ok so first thing is in the car, remove the trim under steering wheel to get to the steering UJ
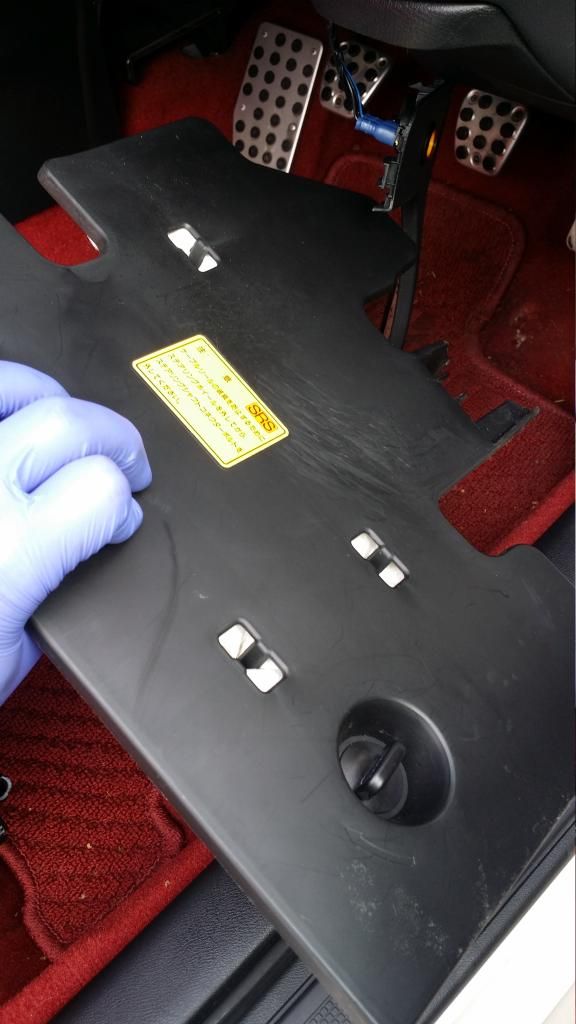
This is important, so make sure your ready to continue. Once you do this, you MUST not move the wheel.
Straighten the wheels. Take out the key.
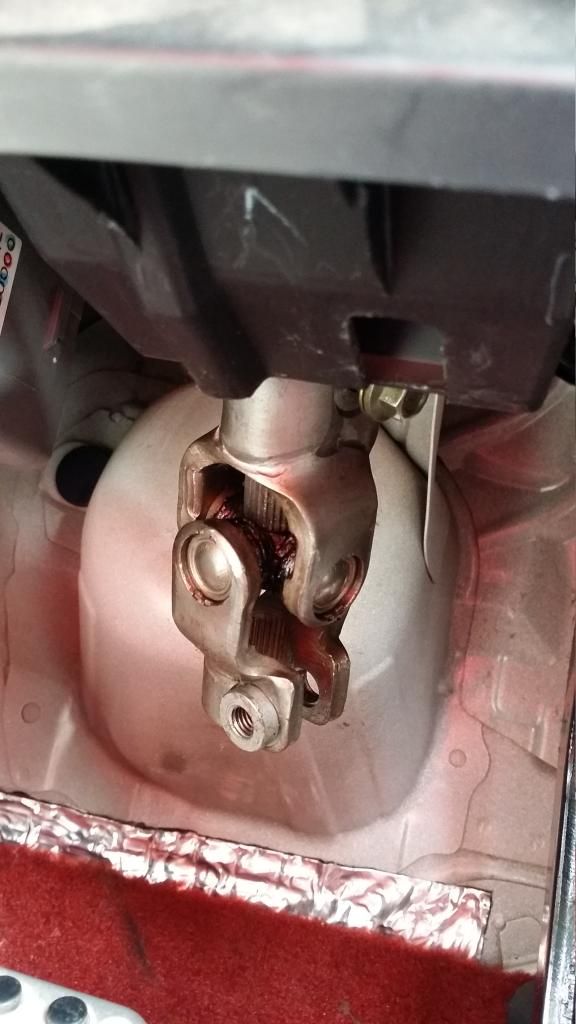
Undo these 2 10mm bolts and remove them, slide the UJ up onto the column, refit the top bolt to stop the UJ falling off. You can mark this if you want. But you shouldnt be moving the wheel or rack.
The reason you cant move the wheel, is you will quite easily snap the spiral cable for the airbag. It will spin very easily and if it snaps, you need a new one. So just leave the steering lock on, and it cant move.
Thats it, your done in the car. So bonnet open, car on stands, wheels off.
You need to remove the airbox. Mines not OE, so havent bothered showing this. Plus i assume you can do this.
Looking down behind the engine, you first need to remove the lower brace. Held on by 4 12mm bolts. And 2 10mm bolts attach heat shields to it. You could access the heat shield from underneath if you struggle, i removed them from the top.
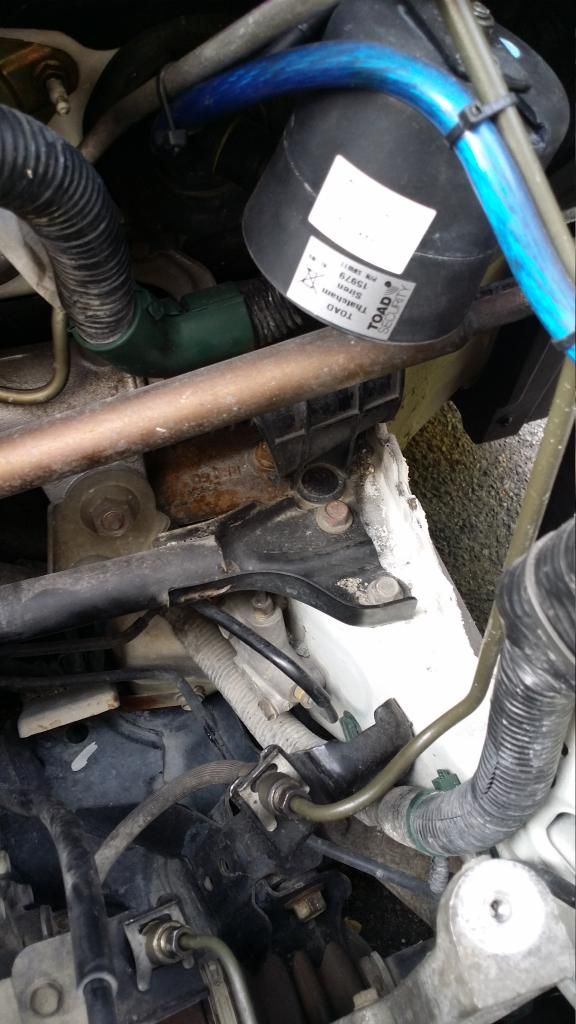
You should then be looking something like this
Next, you want to undo this hose. Ideally, clamp it off first, or stick a bolt in the end. Obviously something to catch the fluid is a good idea. Though not much leaks.
Next undo the 14mm pipe union, and the 10mm bolt that clamps it to the rack. Again, ideally, plug the hole, a bit of cloth, anything to stop dirt getting in there. You can see the pipe and clamp here
This is the pipe undone and pulled out the way
Now you can get to the back pipe. I initially undone the rubber pipe, as i thought i could leave this bit on, as you cant really get on the 10mm for the clamp bracket. But it caught on the heat shields. So crack the 17mm union off, unscrew it, and leave it for now. Its the pipe you can see above.
Now in the wheel arches, you need to remove the split pin, and the 19mm nuts off the track rod ends. How you separate the track rod end from the shock is up to you. I dont like balljoint splitters, as they can often damage the boot. So for me, a whack with a hammer is my method. Shocks it free and out it comes. You can also remove the plastic clips that hold this cover in the NS, one clip is also inside by the rack end. I didnt, as it would have ruined my underseal haha. I just removed the one inside, and bent it out the way.
With both arms now free. Your almost there! Next you are unbolting the rack from the car. So remove the 2 17mm from the NS
And the 3 17mm from the OS
Now the rack should be free. Pull it towards the front of the car a bit, so you can get your hand round the back and remove the 10mm bolt from the pipe clamp. You can just see my glove and socket here. Again, keep the pipe clean, and plug the rack hole.
Your now ready to remove the rack. Be patient, dont rush or force anything. Theres plenty you could snag the boots on. So take it slow and steady.
The rack needs to go out the OS wheel arch. Pull it towards the front, and twist it so the shaft that was in the car, is facing upwards roughly. When you look in the arch, you can see the shape, and how it needs to be angled. Carefully feed it out, twisting tilting etc as needed.
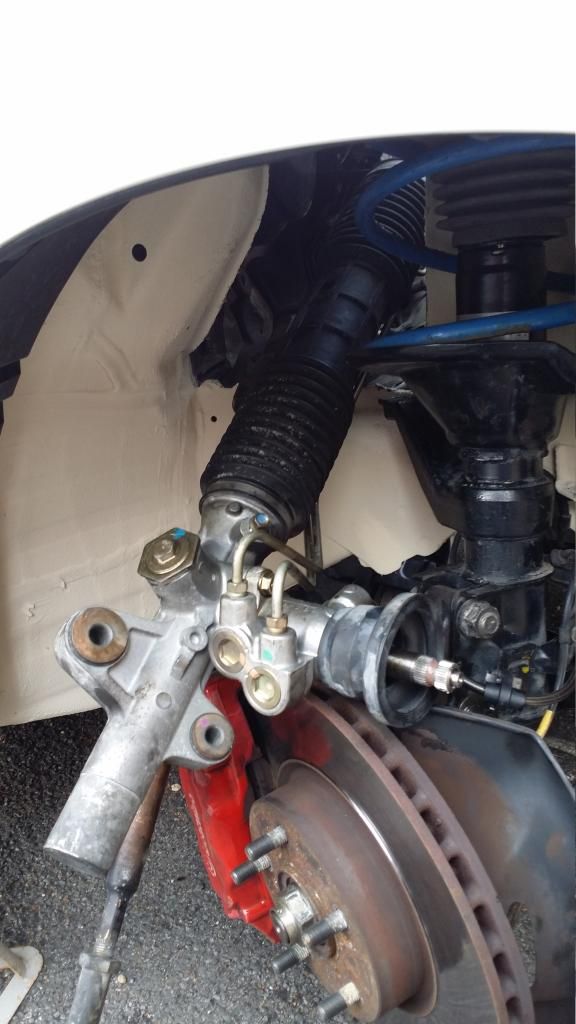
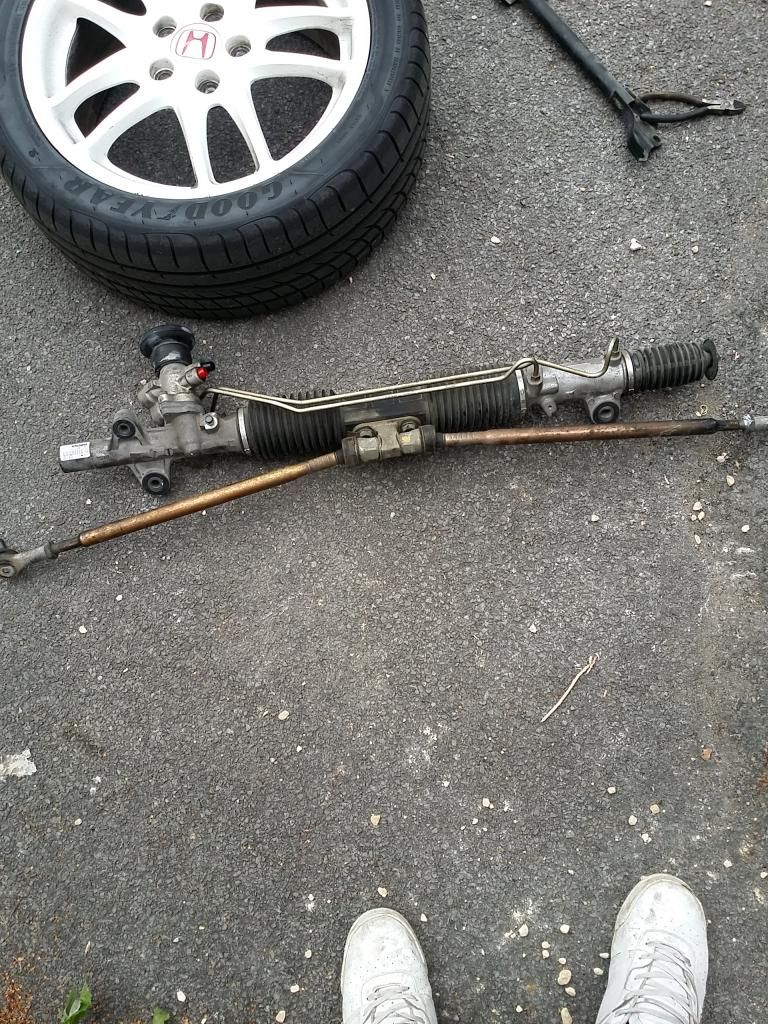
There you have it! A rack on the floor!
Now bend the tabs on the lock washers so you can undo the arms. Then holding the rack with a spanner, use your 29mm or adjustable to undo the rack arm
Do the other arm, then remove the lock washer from the bolt. Remove the 2 bolts that hold the original slider on. Np picture, but its pretty self explanatory.
Then fit the new raiser, making sure you transfer or fit new o rings. Fit the lock washer on the bolt. I fitted it the same side the original one was.
For comparison
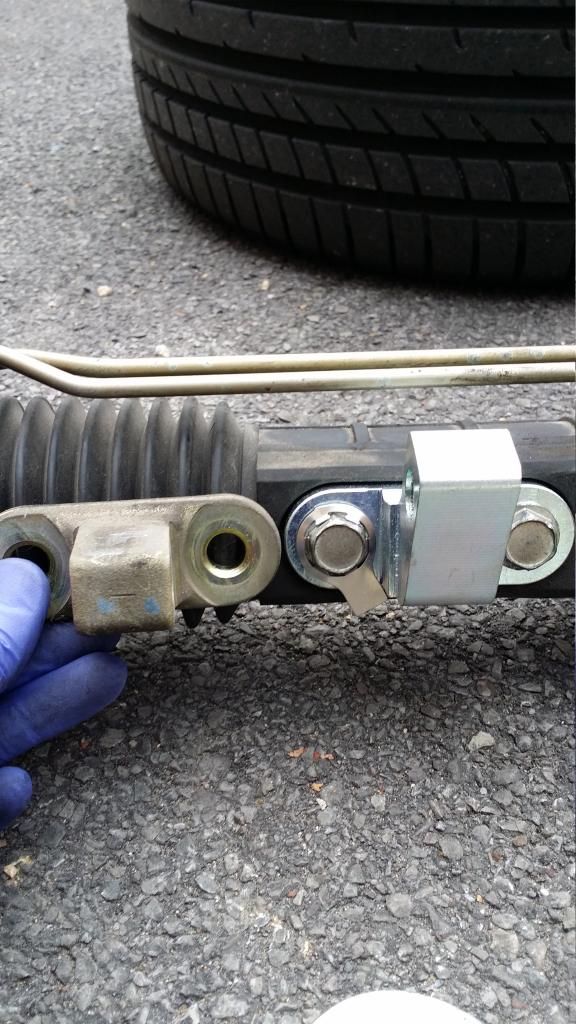
Now fit the arms in, i made sure they went back in the same side, though it probably doesnt matter. Make sure to fit the washer, and bend the tabs over.
Refitting is just a reversal of removing it. Again, just take your time, dont force or rush it. Another pair of hands would help. You could also tie the arms to the rack, so they dont flop around and get stuck on things.
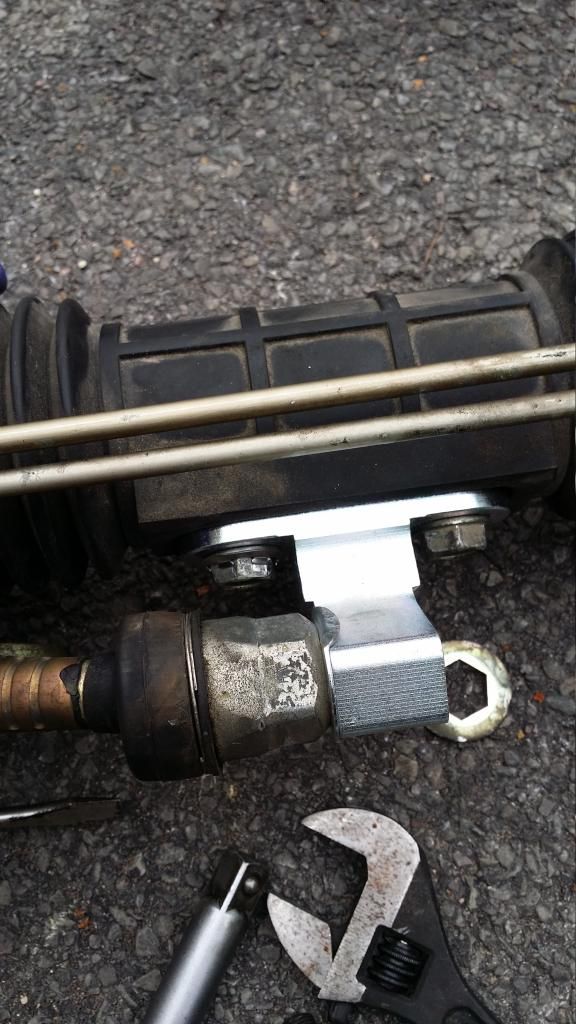
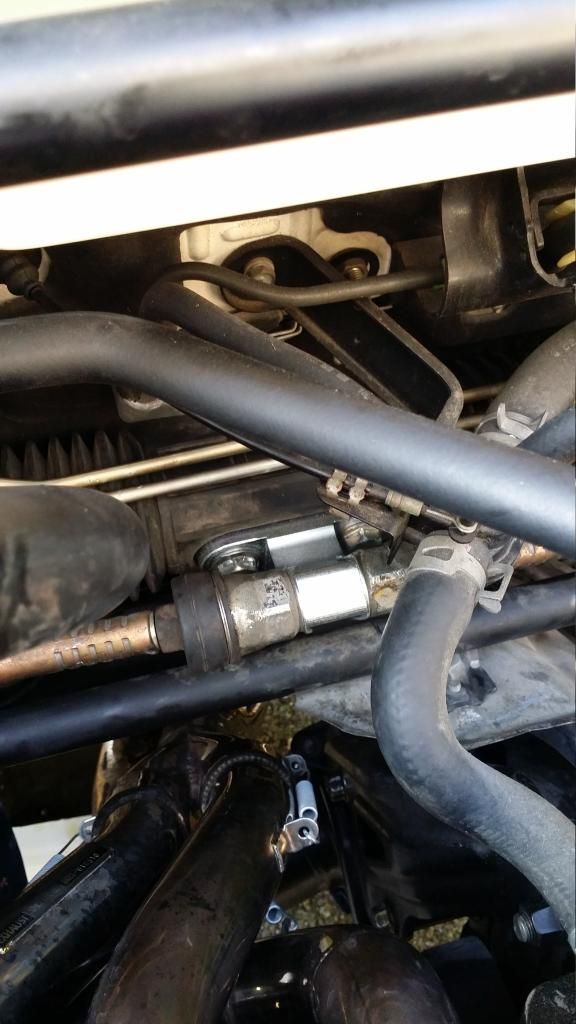
Heres how it looks fitted.
For bleeding the rack, start the car, and turn the rack lock to lock a few times. It will sound noisy at first, then quieten down as the air is removed. Top up the fluid.
Go get your geo done.
I hope this helps, if ive missed anything, its nothing vital. Any questions, fire away.
Ill start by saying, i DID NOT do this in situ. Obviously that would be easier, and ideal. But i couldnt budge my rack arms. Theres very little to get any leverage, and thats with a Buddyclub header. Probably even less with OEM.
If you have a 29mm Crows Foot, you can probably do this a lot easier in situ. But i dont, no one i know had one, and they cost a lot to buy for 1 job.
I also did this at home, so should be doable for everyone. Its obviously a bit more involved. But time wise, took me an hour to get the rack out. That includes taking the pictures, and my little girl 'helping'!
Id imagine 3 hours is probably a reasonable time if you follow this guide, for most people. Quicker if your handy with the steel ala Warren G
Again, im going to assume you know how to jack a car up, have basic tools etc. Ill list anything essential.
Parts wise, i did buy new O Rings and lock washers. If im completely honest, i wouldnt bother if i did it again. But i couldnt find any decent info, so thought better safe than sorry.
I also dont torque anything. But ive years of working on cars behind me. Id advise you check the manual for torque settings if your not happy without them.
Tools Needed
29mm Spanner, or an adjustable will do.
A pipe clamp, or bolt to put in power steering supply hose.
17 and 14 mm spanners, capable of undoing pipe unions. Cheap ones can slip.
Cardboard, blanket, something to drape over the slam panel as you will be leaning on it. It hurts.
Some power steering fluid.
Parts i bought were
53535S5A003 Lock Washer x 1 If your careful, you can reuse. Part on the right
53662S5A003 O RIng x 2 Again, you could reuse these. The go on the bolts that hold the raiser to the rack. Centre in picture
53536S5A900 Washer x 2 These are bent over to secure the arm, you could spin and bend a different part over. Left in picture.
Ok so first thing is in the car, remove the trim under steering wheel to get to the steering UJ
This is important, so make sure your ready to continue. Once you do this, you MUST not move the wheel.
Straighten the wheels. Take out the key.
Undo these 2 10mm bolts and remove them, slide the UJ up onto the column, refit the top bolt to stop the UJ falling off. You can mark this if you want. But you shouldnt be moving the wheel or rack.
The reason you cant move the wheel, is you will quite easily snap the spiral cable for the airbag. It will spin very easily and if it snaps, you need a new one. So just leave the steering lock on, and it cant move.
Thats it, your done in the car. So bonnet open, car on stands, wheels off.
You need to remove the airbox. Mines not OE, so havent bothered showing this. Plus i assume you can do this.
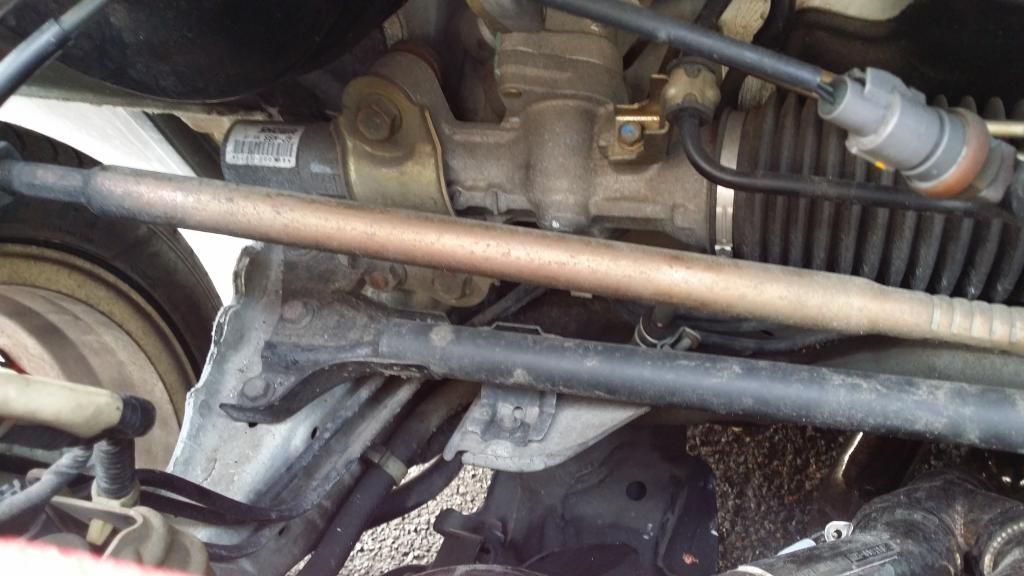
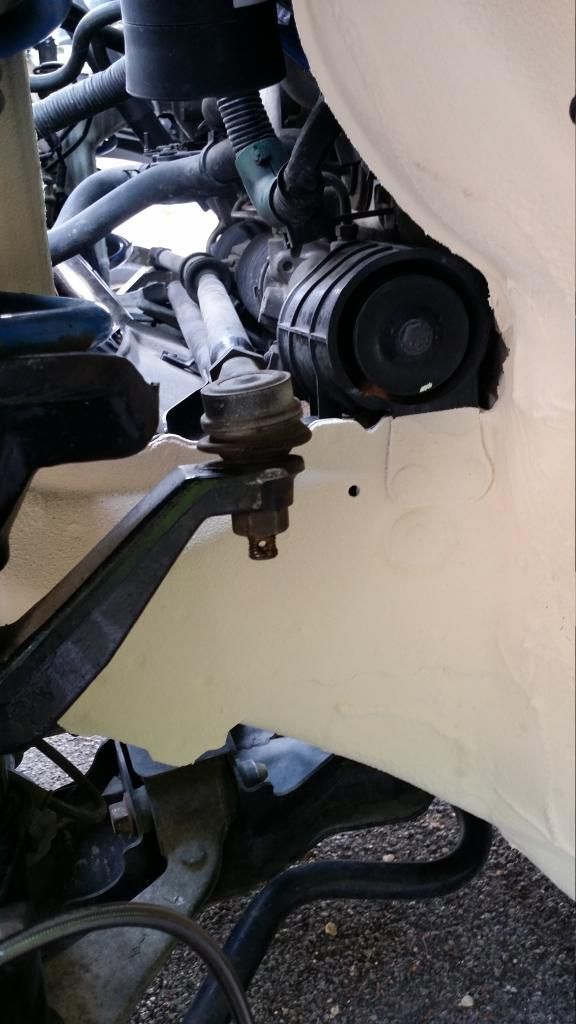
Looking down behind the engine, you first need to remove the lower brace. Held on by 4 12mm bolts. And 2 10mm bolts attach heat shields to it. You could access the heat shield from underneath if you struggle, i removed them from the top.
You should then be looking something like this
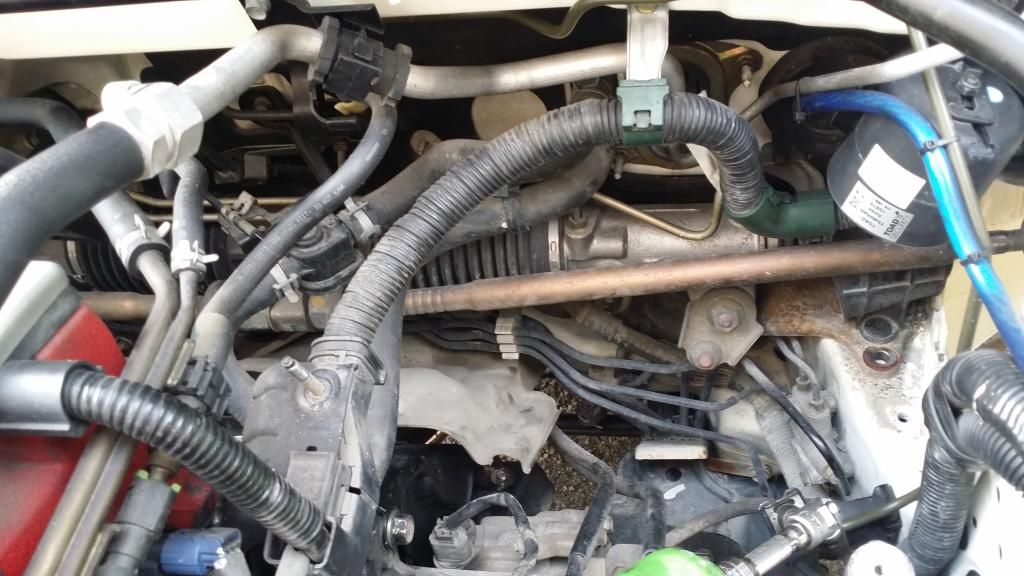
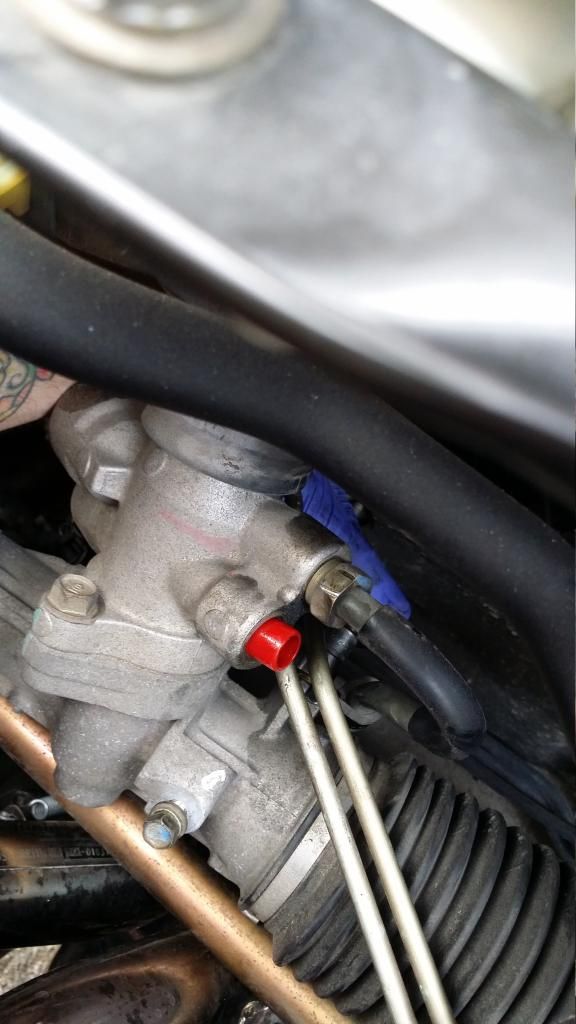
Next, you want to undo this hose. Ideally, clamp it off first, or stick a bolt in the end. Obviously something to catch the fluid is a good idea. Though not much leaks.
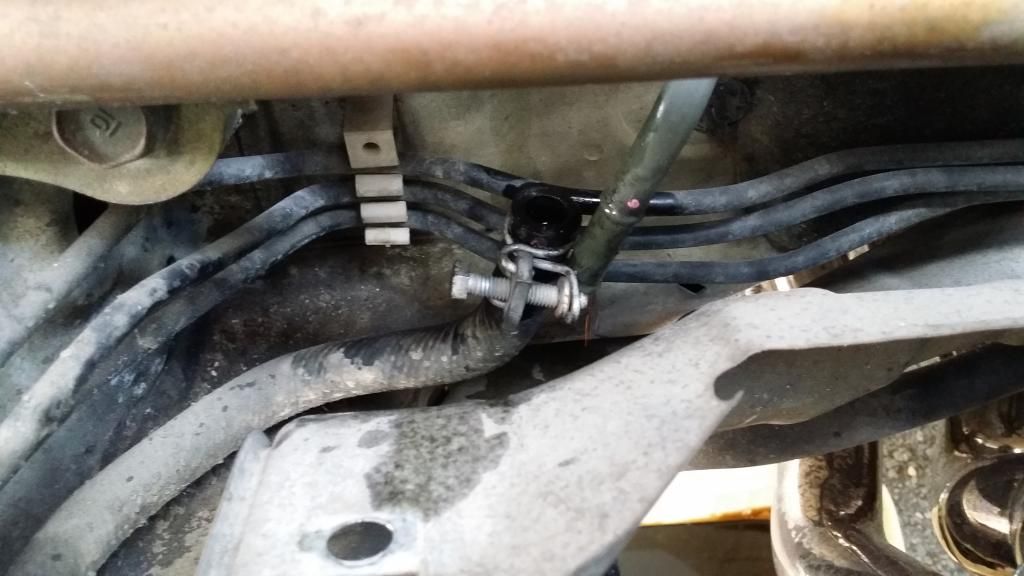
Next undo the 14mm pipe union, and the 10mm bolt that clamps it to the rack. Again, ideally, plug the hole, a bit of cloth, anything to stop dirt getting in there. You can see the pipe and clamp here
This is the pipe undone and pulled out the way
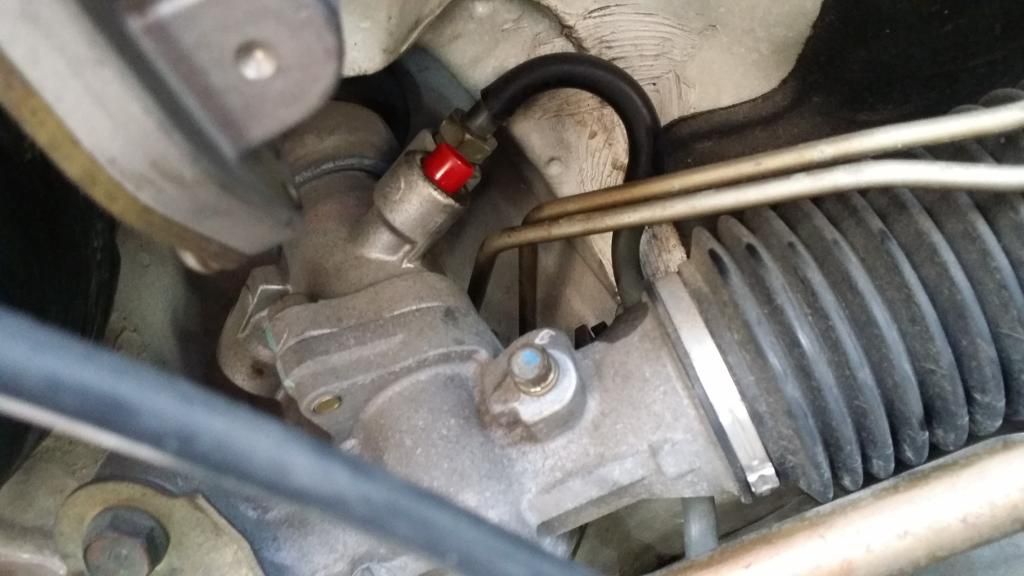
Now you can get to the back pipe. I initially undone the rubber pipe, as i thought i could leave this bit on, as you cant really get on the 10mm for the clamp bracket. But it caught on the heat shields. So crack the 17mm union off, unscrew it, and leave it for now. Its the pipe you can see above.
Now in the wheel arches, you need to remove the split pin, and the 19mm nuts off the track rod ends. How you separate the track rod end from the shock is up to you. I dont like balljoint splitters, as they can often damage the boot. So for me, a whack with a hammer is my method. Shocks it free and out it comes. You can also remove the plastic clips that hold this cover in the NS, one clip is also inside by the rack end. I didnt, as it would have ruined my underseal haha. I just removed the one inside, and bent it out the way.
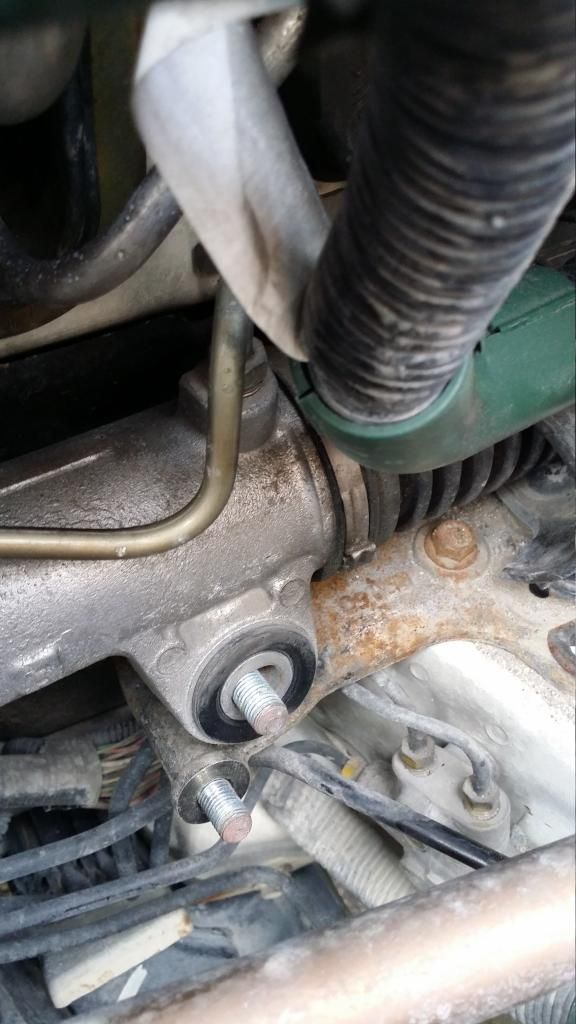
With both arms now free. Your almost there! Next you are unbolting the rack from the car. So remove the 2 17mm from the NS
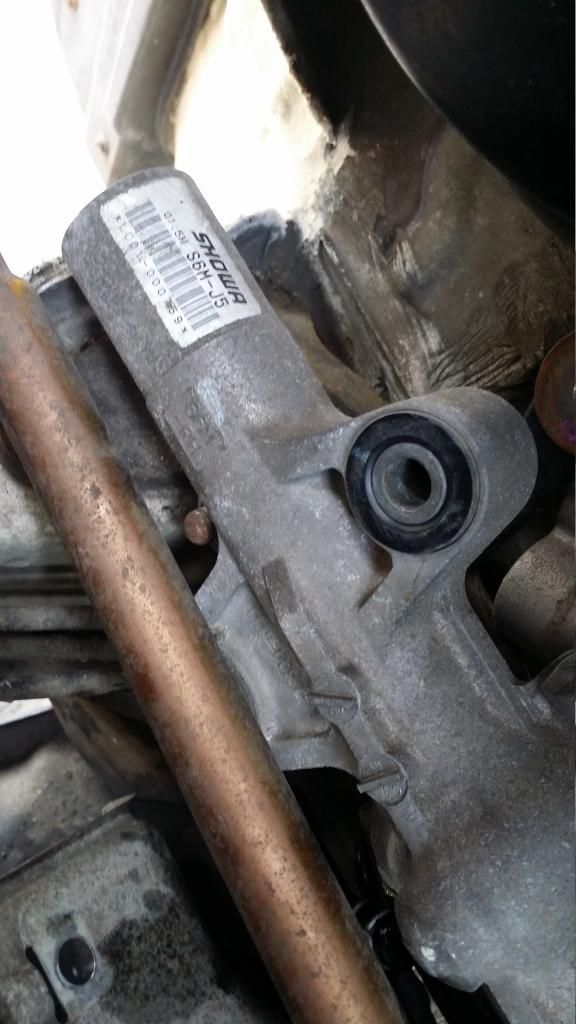
And the 3 17mm from the OS
Now the rack should be free. Pull it towards the front of the car a bit, so you can get your hand round the back and remove the 10mm bolt from the pipe clamp. You can just see my glove and socket here. Again, keep the pipe clean, and plug the rack hole.
Your now ready to remove the rack. Be patient, dont rush or force anything. Theres plenty you could snag the boots on. So take it slow and steady.
The rack needs to go out the OS wheel arch. Pull it towards the front, and twist it so the shaft that was in the car, is facing upwards roughly. When you look in the arch, you can see the shape, and how it needs to be angled. Carefully feed it out, twisting tilting etc as needed.
There you have it! A rack on the floor!
Now bend the tabs on the lock washers so you can undo the arms. Then holding the rack with a spanner, use your 29mm or adjustable to undo the rack arm
Do the other arm, then remove the lock washer from the bolt. Remove the 2 bolts that hold the original slider on. Np picture, but its pretty self explanatory.
Then fit the new raiser, making sure you transfer or fit new o rings. Fit the lock washer on the bolt. I fitted it the same side the original one was.
For comparison
Now fit the arms in, i made sure they went back in the same side, though it probably doesnt matter. Make sure to fit the washer, and bend the tabs over.
Refitting is just a reversal of removing it. Again, just take your time, dont force or rush it. Another pair of hands would help. You could also tie the arms to the rack, so they dont flop around and get stuck on things.
Heres how it looks fitted.
For bleeding the rack, start the car, and turn the rack lock to lock a few times. It will sound noisy at first, then quieten down as the air is removed. Top up the fluid.
Go get your geo done.
I hope this helps, if ive missed anything, its nothing vital. Any questions, fire away.