
TypeGRRR
Advanced Member
- Messages
- 1,272
I replaced my drivers seat bolster today, I was going to swap the driver and passenger seats around too, but ran into difficulties. I have put this guide together to help out other owners. Please note as I took both seats out, some pictures are in fact of passenger side, so please excuse me if the instructions look mirrored in some of the photos. Also as I didn't have a guide to follow, I did things in a slightly different order, which is why you might see things still on the photos that you have taken off already etc...
Anyway, here it is...
What tools you'll need
• Ratchet
• Extension bar
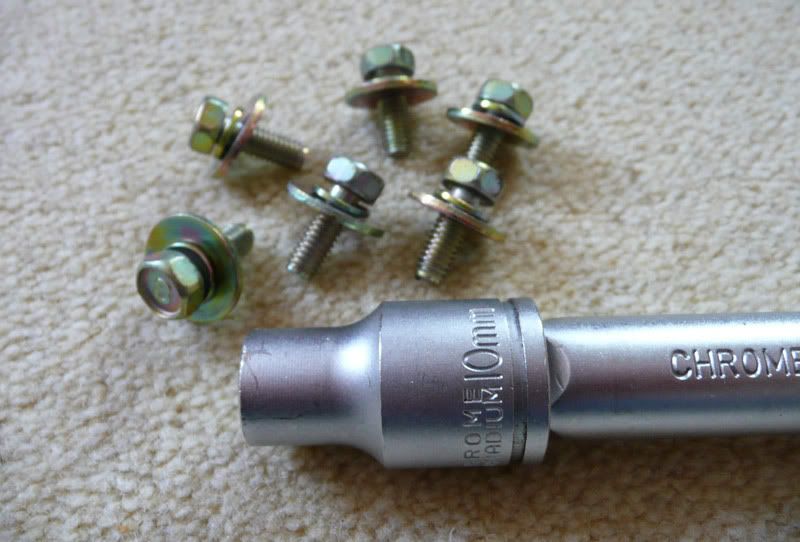
• 14mm socket
• 10mm socket
• Pliers
• Small cross head screwdriver
• Large cross head screwdriver
• Straight head screwdriver
Recommended
• Piece of cloth
• Large sheet
• WD40 or similar
First of all if you are tackling the drivers seat, there is a electrical connector beneath the seat that will need to be disconnected, you do not have to worry about disconnecting the battery, but to be on the safe side, I'd suggest that you do not have your ignition on.

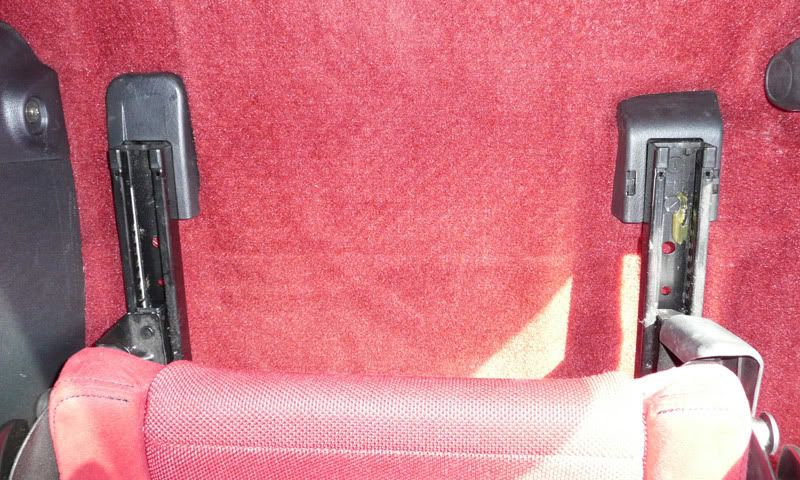
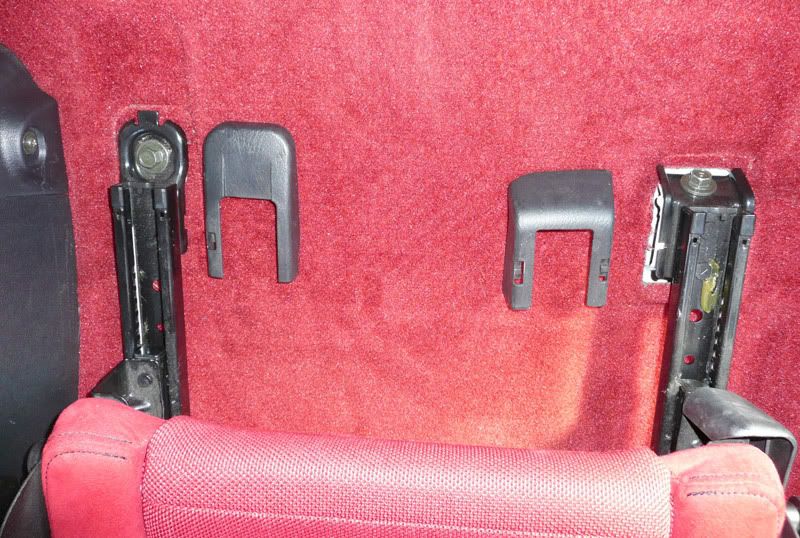
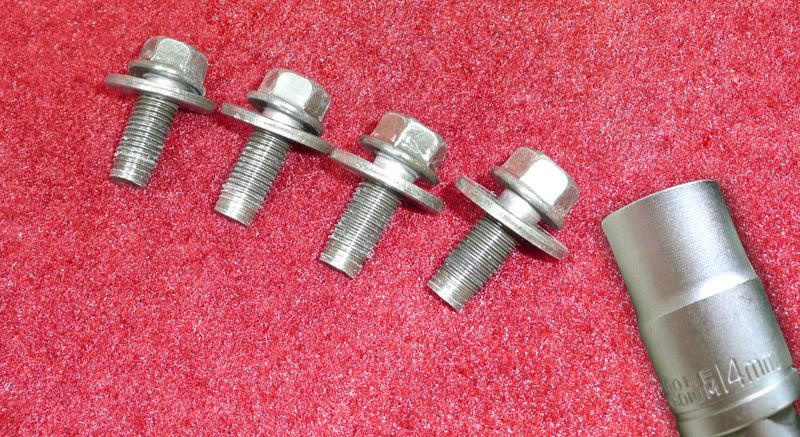
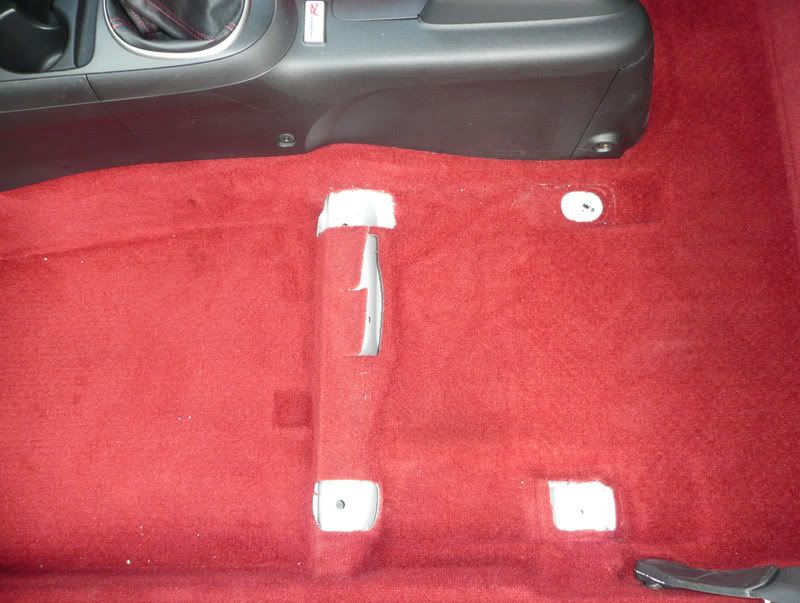
There are 4 bolts holding each seat in place, 2 at the front, 2 at the rear (the rear mounts are beneath plastic covers). You will need a 14mm socket to remove all the bolts. They are the same, so you do not have to worry about mixing them up.
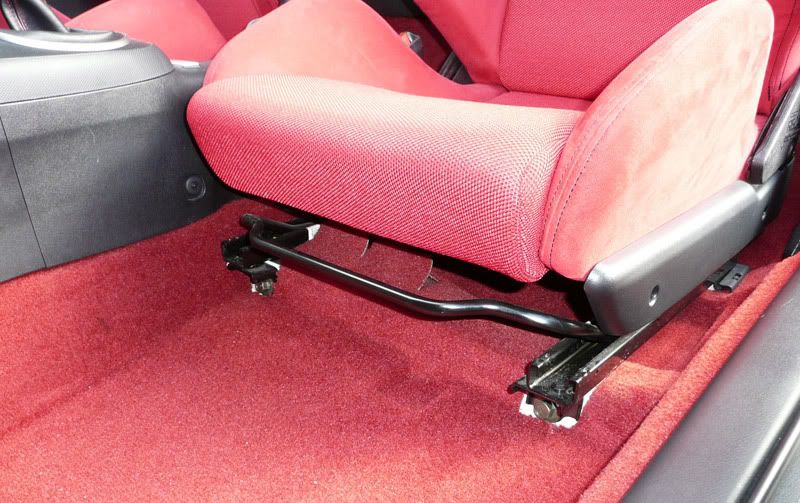
Careful when removing the seat, you may want to lay a sheet over the door sill, to prevent unsightly scuffs should the worst happen.
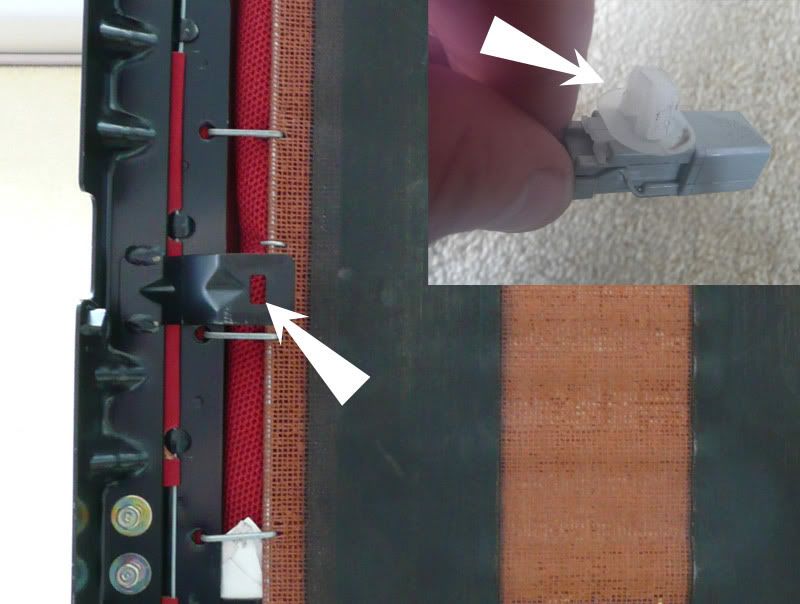
Once you have got the seat out, you are in a position to start taking it to pieces. First of all, if you are working on the drivers seat, you will need to unclip the electrical connector at the base of the seat. Use some pliers to pinch the tabs at the back and pull the connector out.
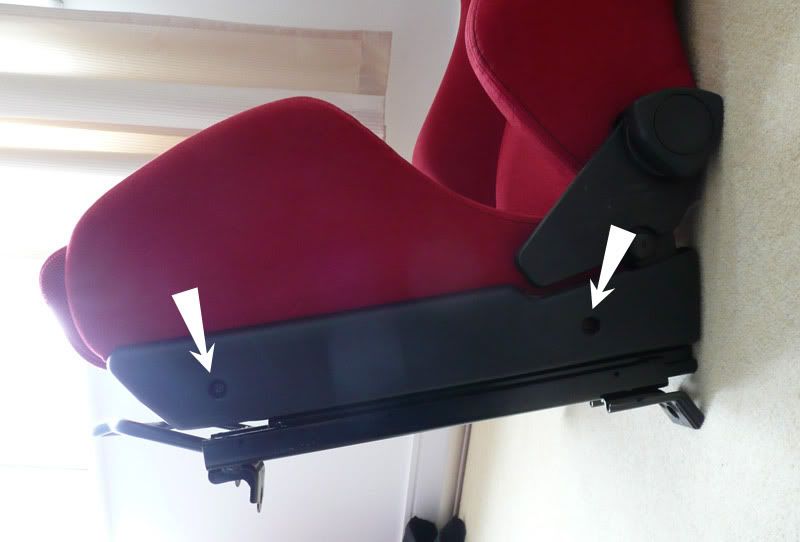
Using a small cross head screwdriver, remove the 2 screws holding on the plastic trim on the outside edge of the seat.
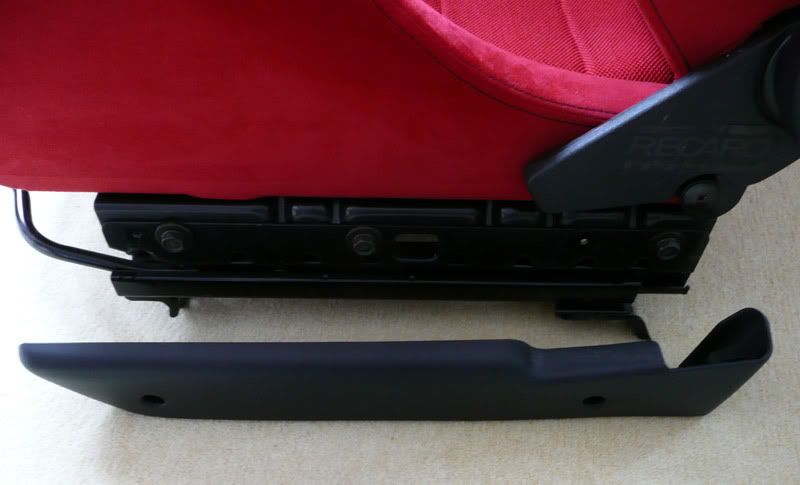
Using a 14mm socket remove the bolts attaching the seat runner, there are 3 each side.

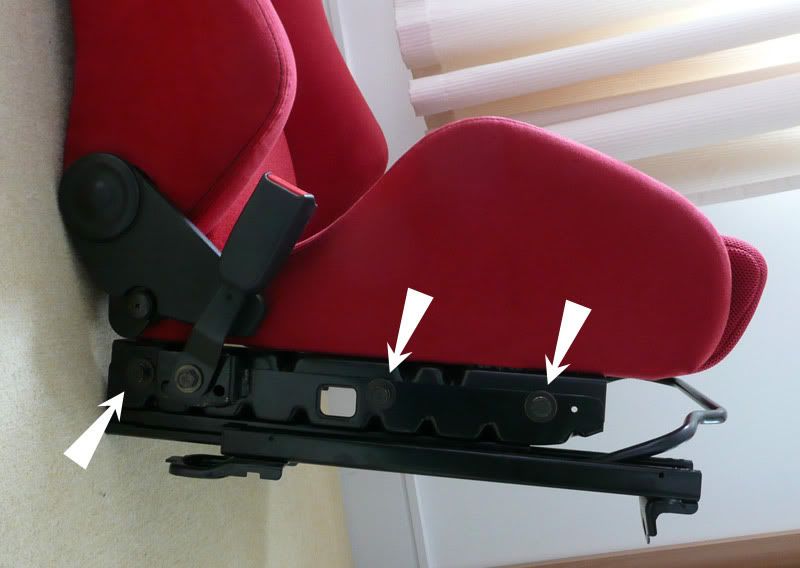
The seat runner assembly looks like this
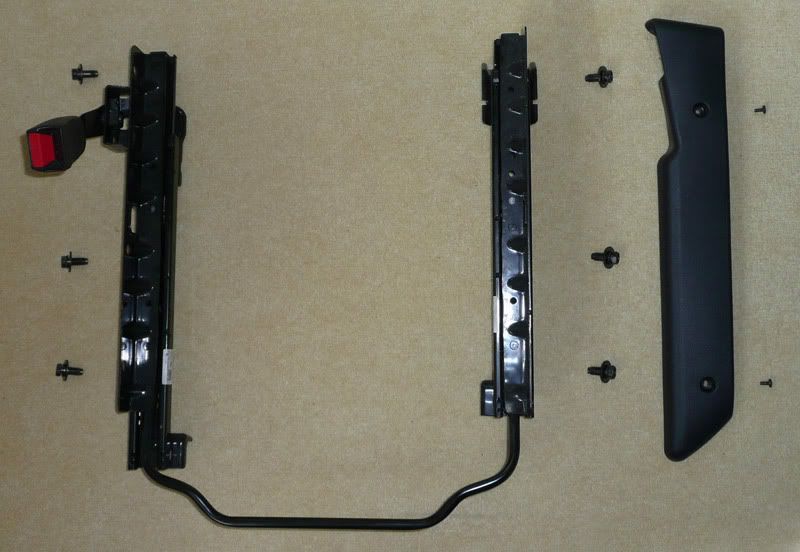
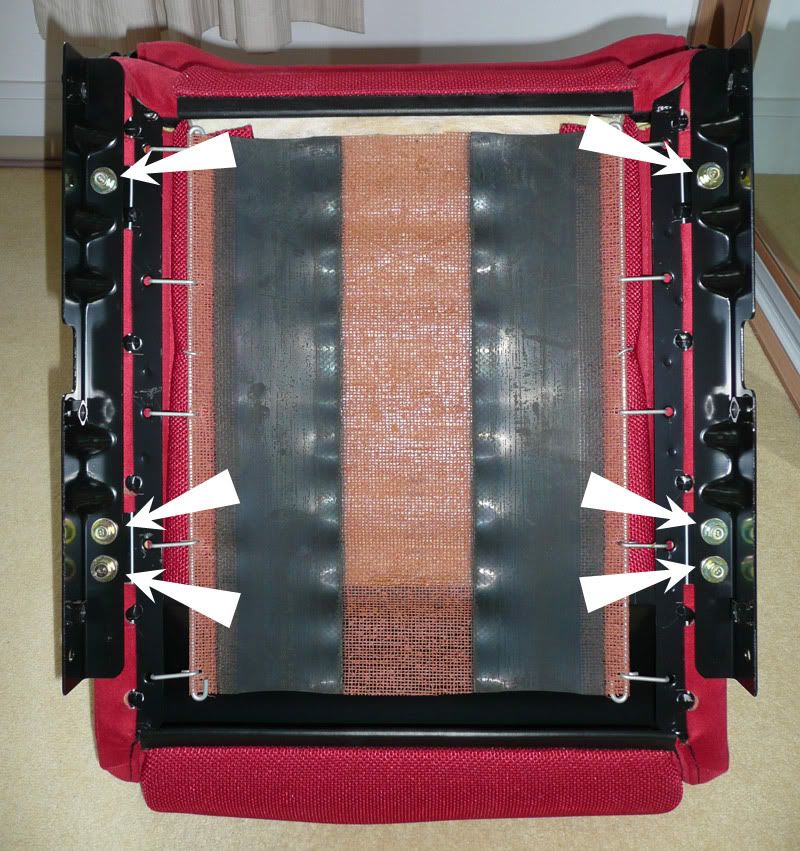
Next you will need to remove the metal brackets that hold the runner to the seat. Using a 10mm socket remove all 6 bolts.
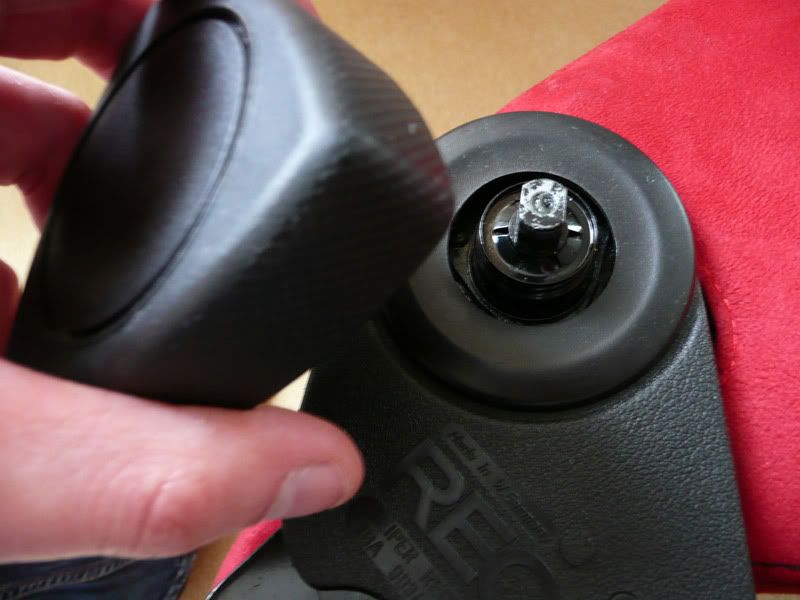
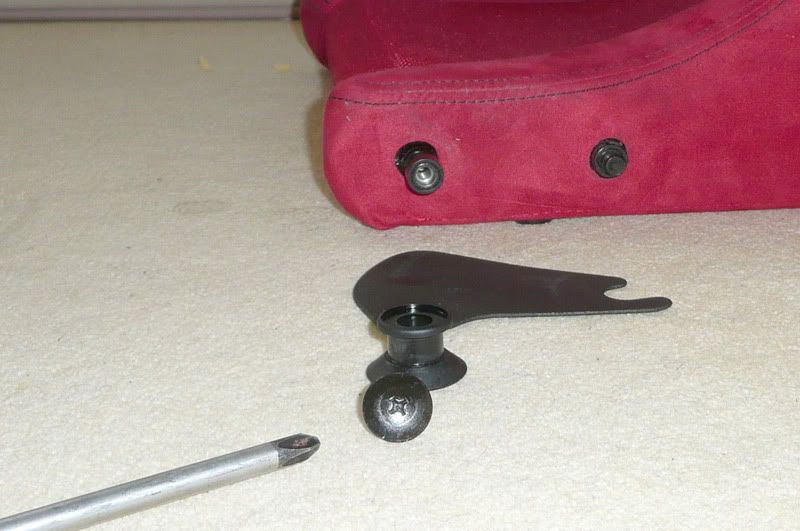
Turning the seat on it's side you need to take off the winder handle, this just pulls off, no need to remove the circular inner cover...
With a straight head screwdriver wrapped in cloth gently prise off the plastic trim, the fixing points are circled. I recommend getting the end of the screwdriver as close as possible to these points or you will run the risk of snapping the trim. You will need to do this to both sides of the seat.

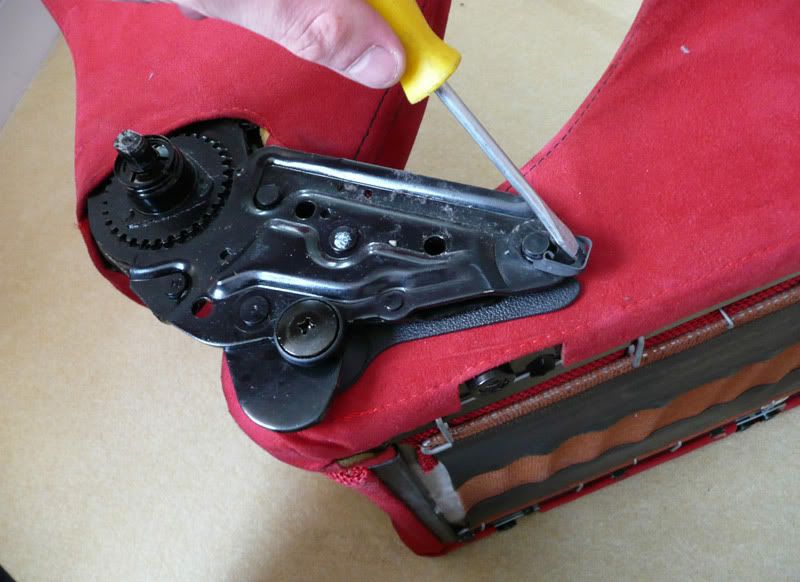
With a straight head screwdriver, tap the retaining spring clips off, again you need to do this to both sides of the seat.
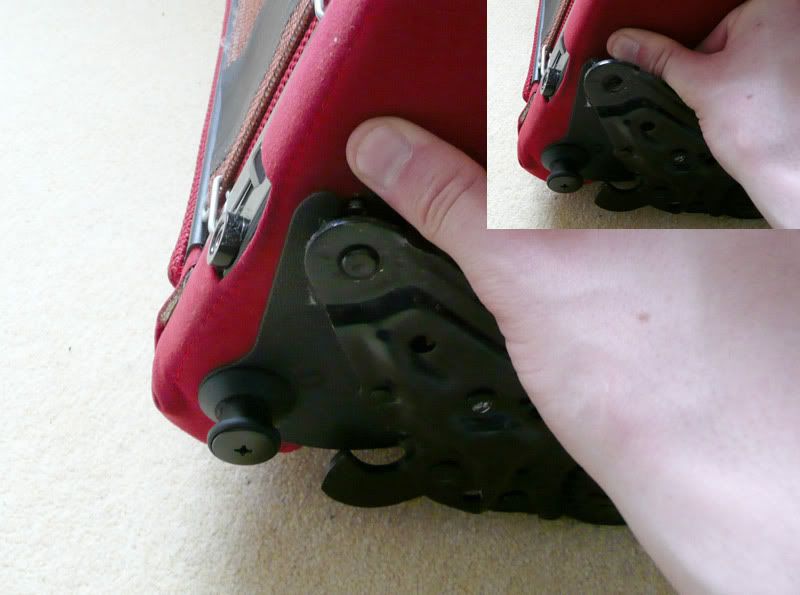
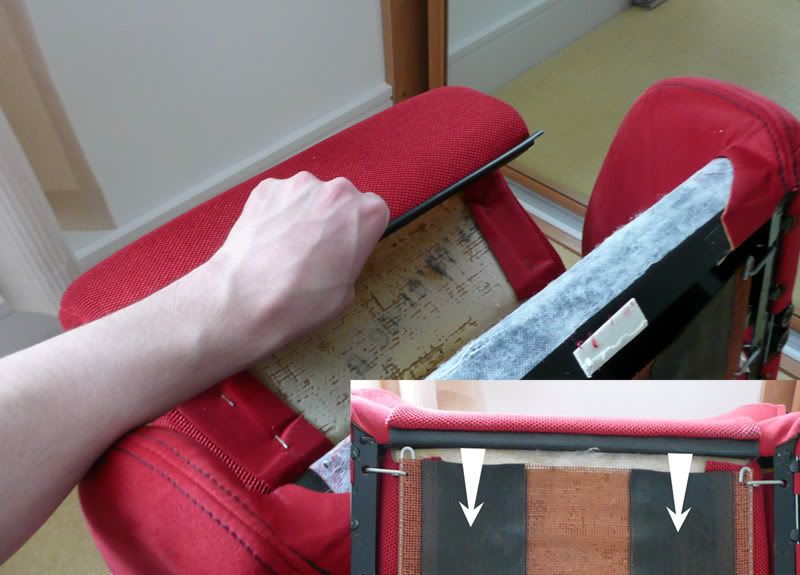
You are now in the position to remove the seat base from the back, first of all, hinge the seat as you would for letting someone in the rear of your car. Then pull the hinge part whilst pushing away the seat back with your thumb, you really need to do both sides simultaneously, but I couldn't show you that as I do not have a third arm to take a photo.
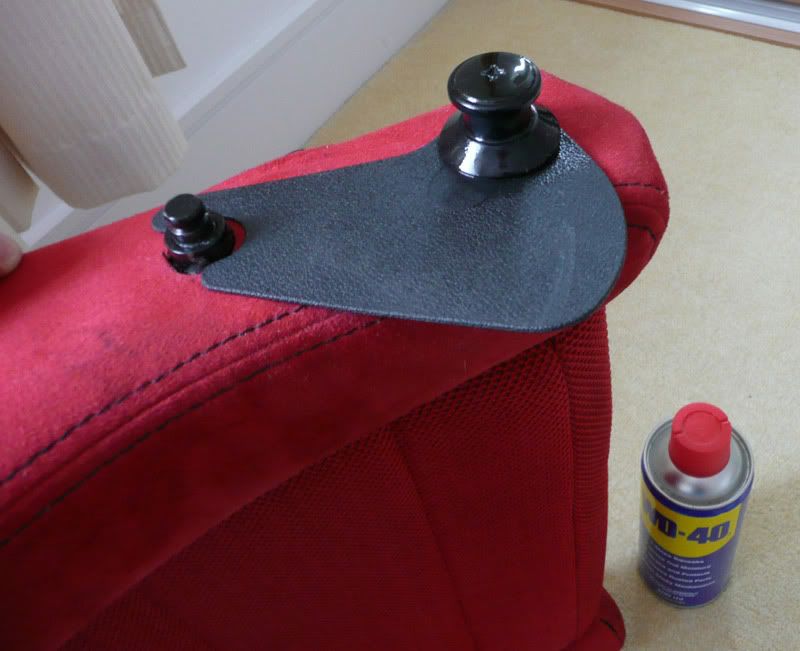
Time to break out the WD40, as this next fixing is a hard one, why Recaro use a cross head screw rather than a bolt is beyond me... :roll: Spray the fixing sparingly to avoid getting it on your seats, leave for a few minutes to allow the WD40 to penetrate the thread. Then with a large cross head screwdriver, undo the screw whilst trying not to round off the head. Once removed, this allows you to remove all the pieces of plastic trim with it.

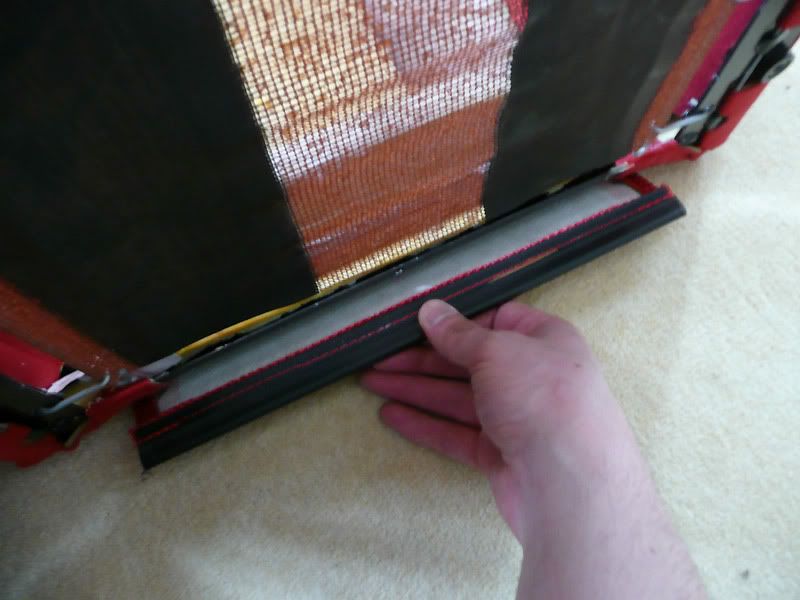
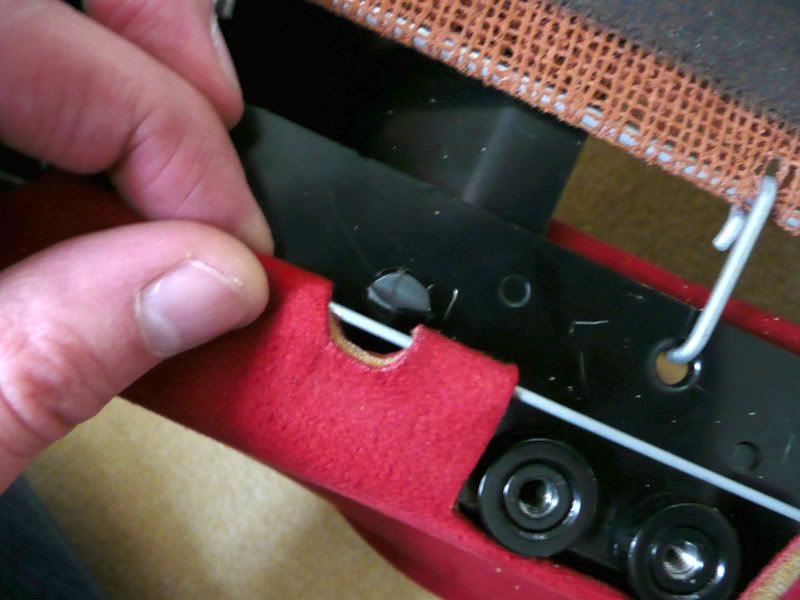
This next part probably isn't essential although it only takes a few minutes and makes your life easier later on... Turn the seat base upside down and unhook the 2 central hooks using a small straight head screwdriver. Then at the front edge of the seat, there is a black plastic U channel holding the seat swab to the main frame, slide this downwards, it feels a little stuck on, but will come off with some persistence. The swab can now be eased away from the frame, careful not to bend the foam. A U channel is at the back edge of the seat, much the same as the front edge, unhooking this will release the seat swab from the base.
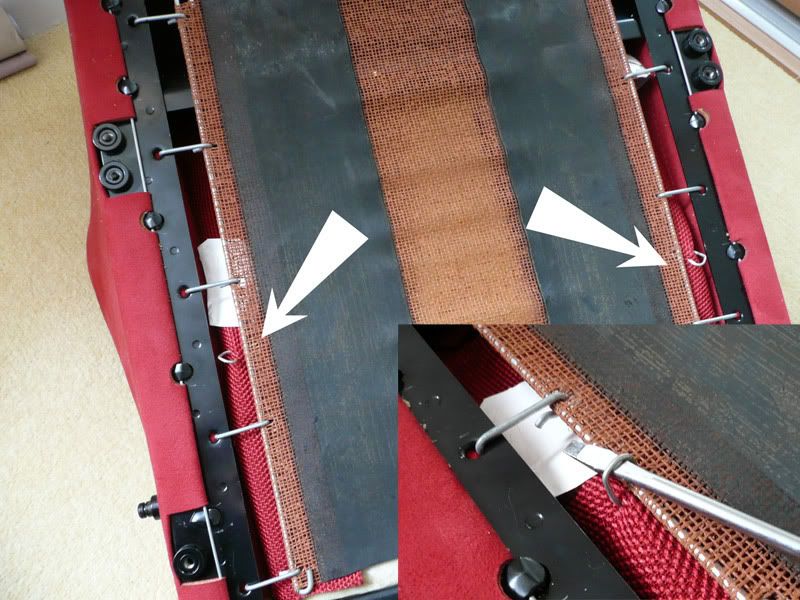
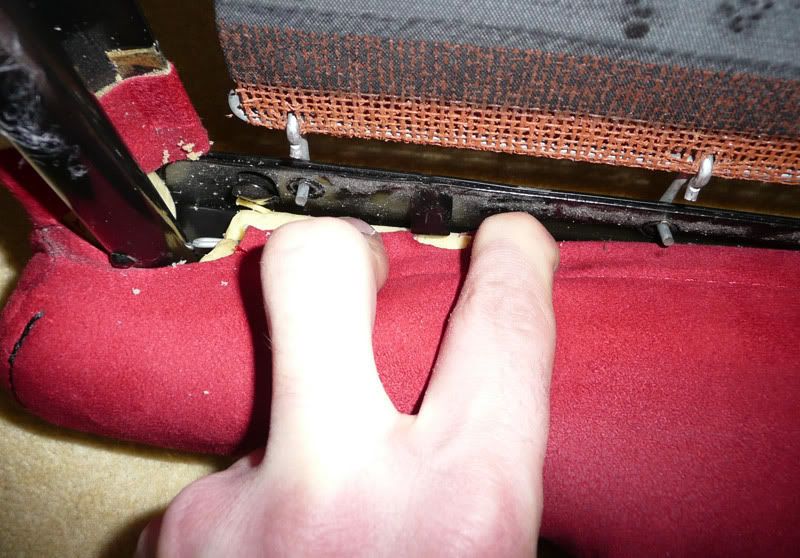
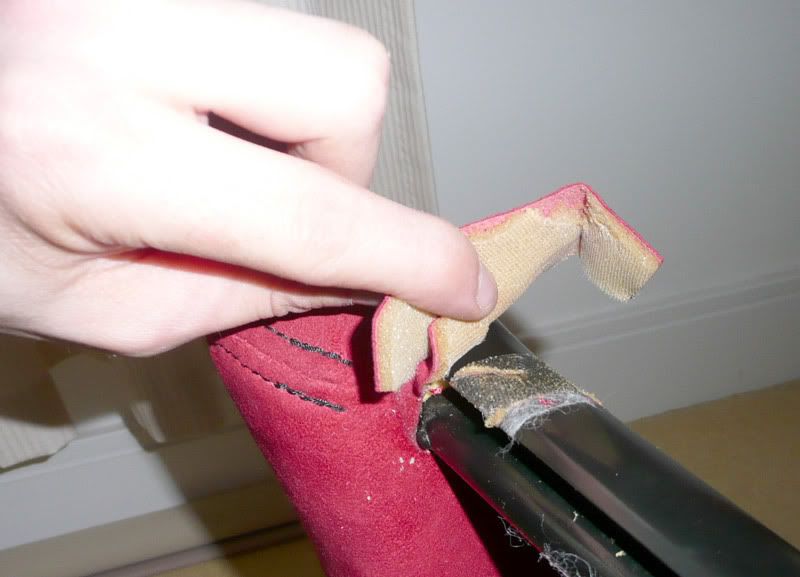
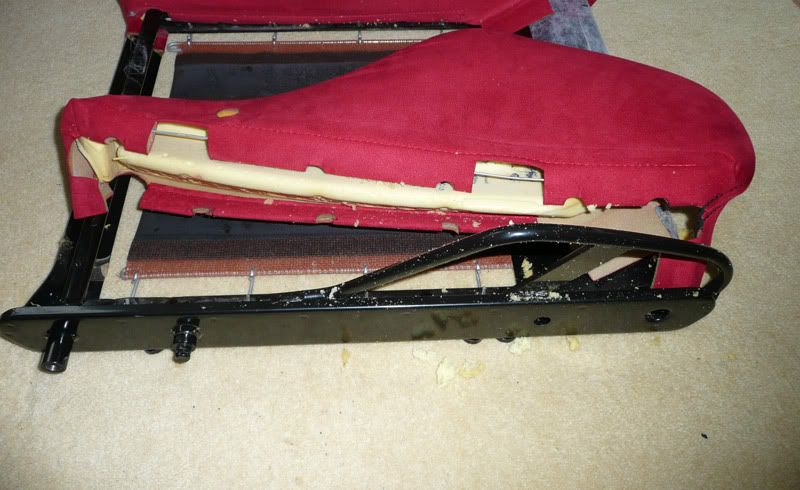
Now for removing the bolster itself, there are two stiff metal wires running the length of the bolster that hook into tabs, these are the only things holding the bolster on.... Here comes the messy part where bits of foam fall out all over the place (you have been warned). Starting with the inside edge, unhook the wire from the 3 tabs by pushing the wire downwards and inwards, should be clear when you're doing it.

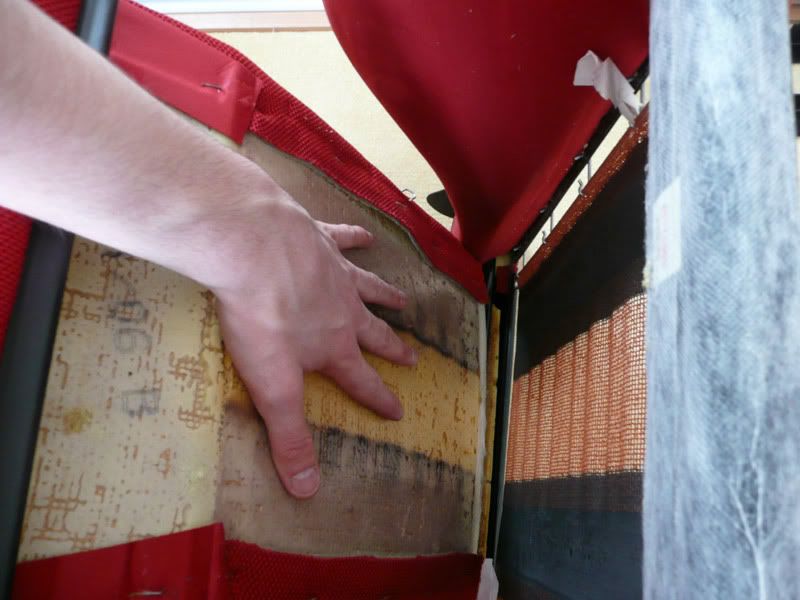
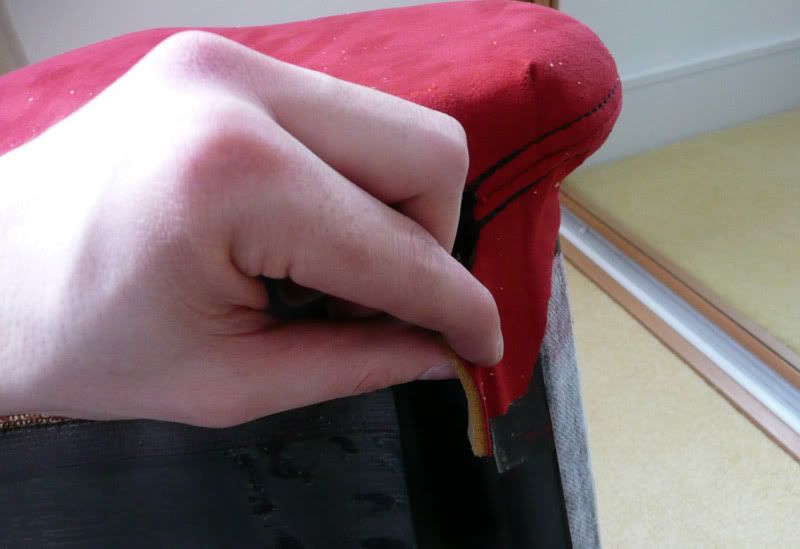
Some of the bolster material is stuck to the frame at the front and back edge, gently pull this away from the metal.
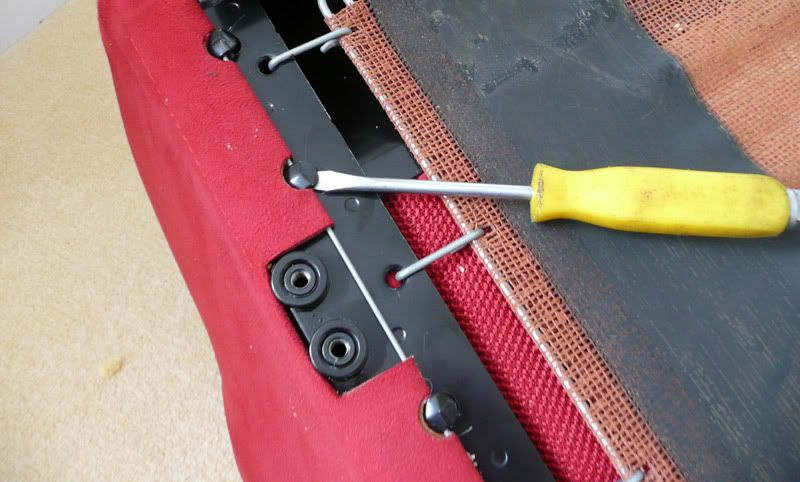
Finally turning the seat base upside down, using a straight headed screwdriver pry open the 6 tabs just enough to allow the wire to be removed. I'd suggest trying to remove the wire from the tabs in the middle first as it's easier. If you can't use just your fingers, you may want to try pushing it with a screwdriver.
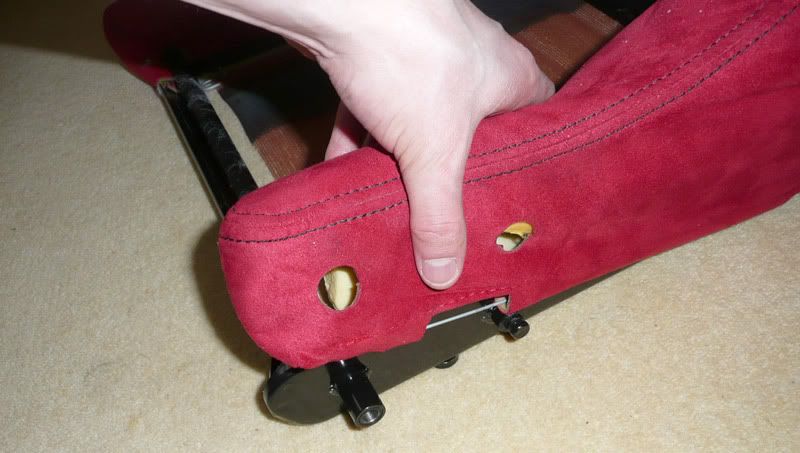
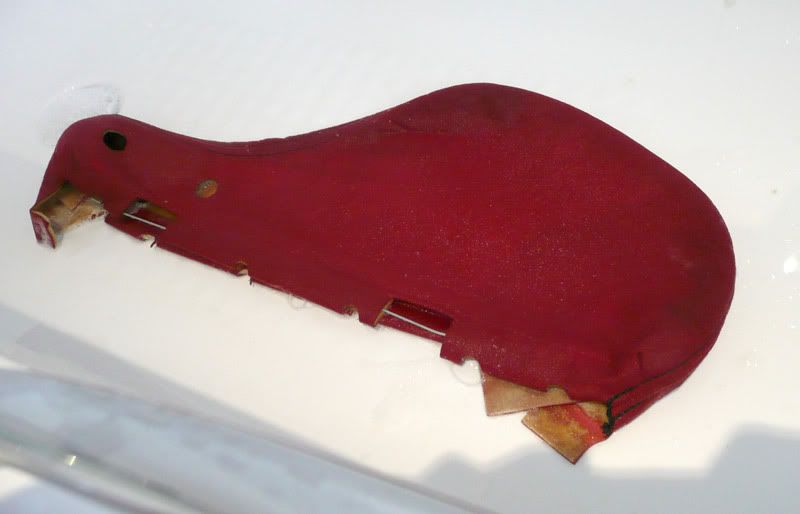
That's it, the bolster padding and cover can be removed from the metal frame. I'd recommend starting at the back where the two cut outs are. Once removed you may want a bit of a tidy up as the foam goes everywhere....

If you didn't buy a new cover You may want to give yours a good scrub, I drowned mine in the bath using a lot of cleaning product and it came up very well indeed.
I fitted my new bolster into the cover whilst it was pretty wet, as I feared it shrinking as it dried out. Note: I did NOT have to cut the bolster supplied by Capitol Seating at all. Spend a few minutes trying to get the front two thirds of the bolster sitting nicely in the cover, then slip the back edge into the cover (the thin bit), it will probably buckle and hang out the bottom a little bit, but don't worry too much. Hook the bolster back over the frame and try and get it sitting as best as you can. Re-attach the wire on the inside edge first, this should be fairly easy, then turn the seat over and using quite a bit of force hook the wire back onto the 6 tabs. Once you have done this hopefully your cover will be nice and tight. Bend the tabs back down to secure the bolster in position....
Then all you have to do is, put it all back together again...")
----------------------------------------------
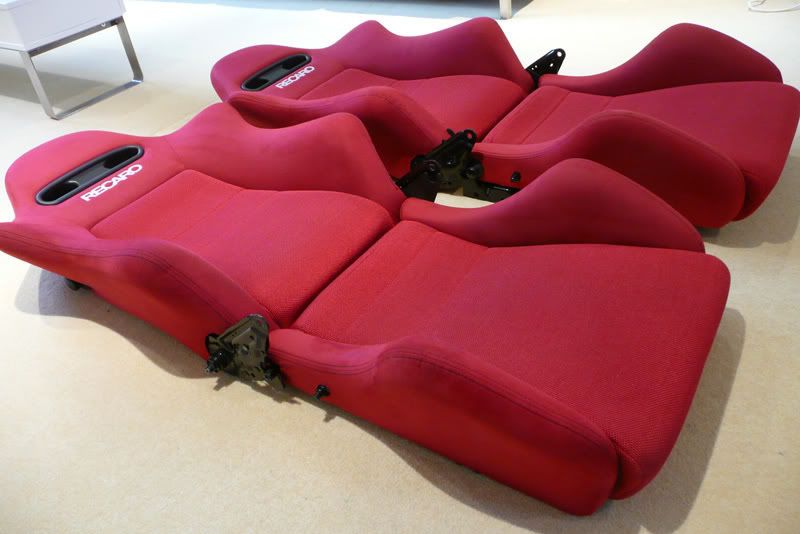
Here's how my seats turned out after a very thorough clean, they have come up far better than I could of hoped.
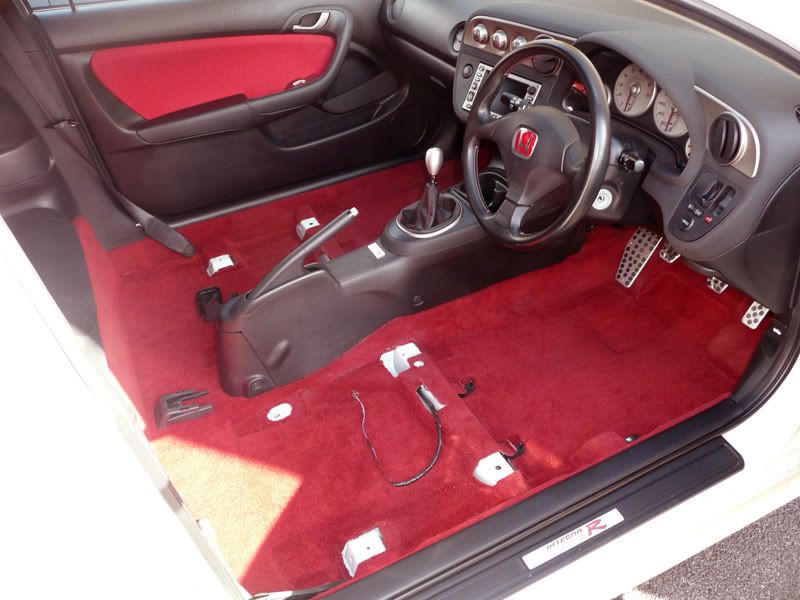
Seats removed
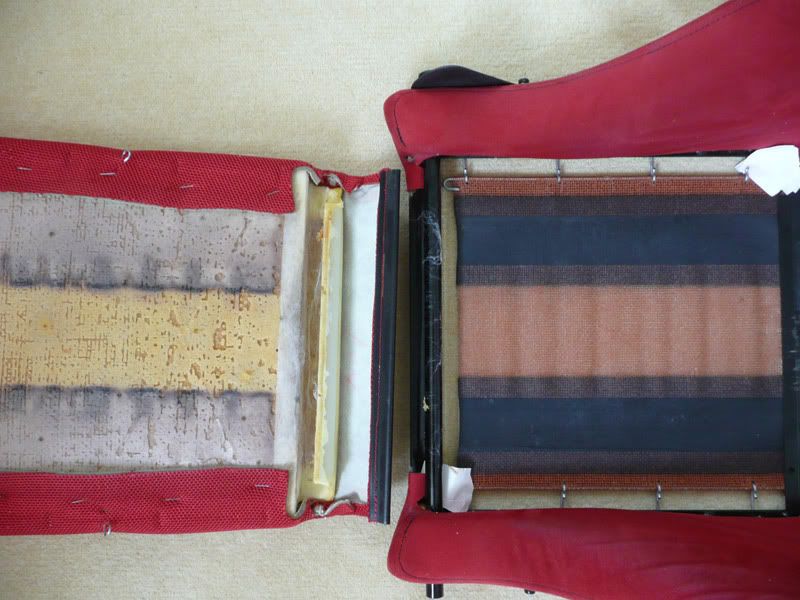
Old, New and cover
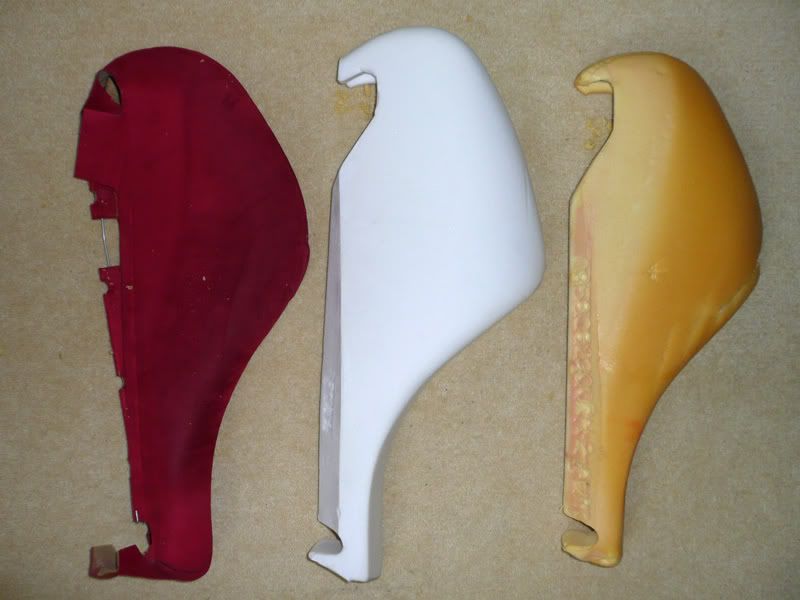
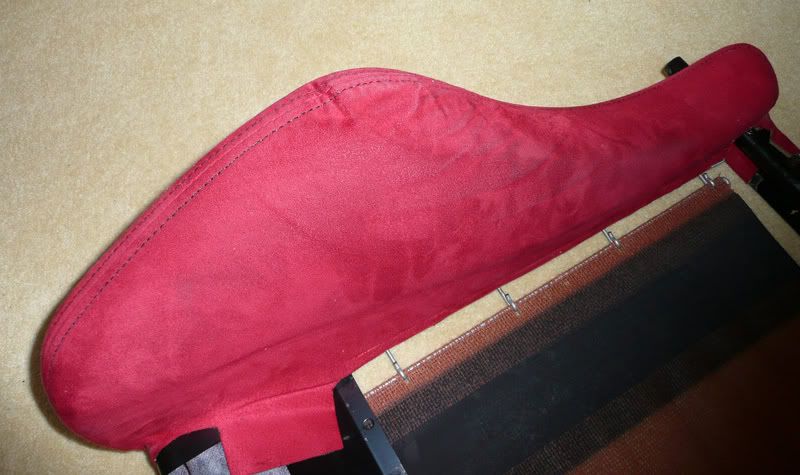
Lower bolster before
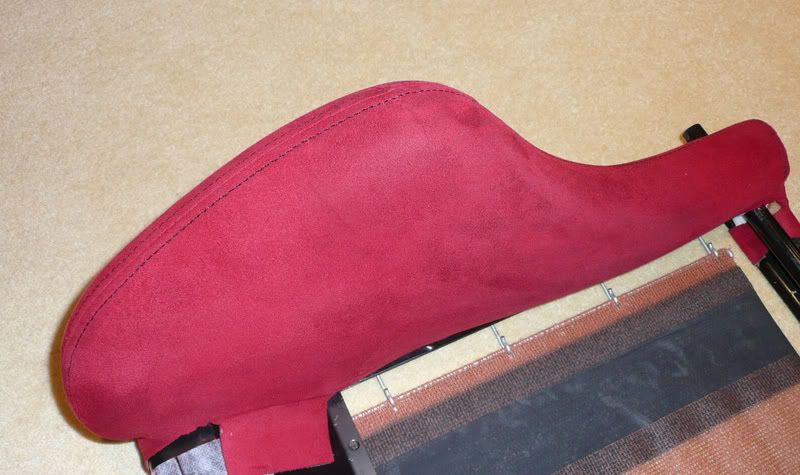
Lower bolster after
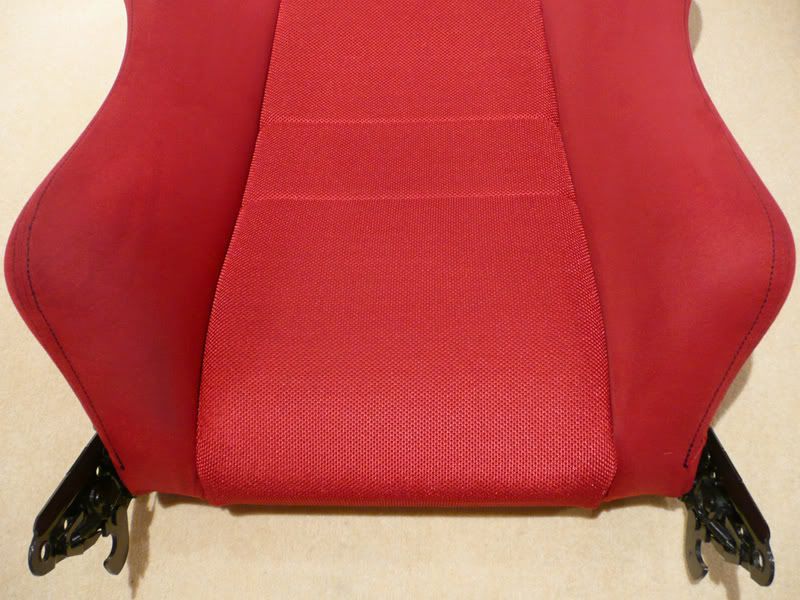
Upper bolster before

Upper bolster after
Some VERY clean seats...
Anyway, here it is...
What tools you'll need
• Ratchet
• Extension bar
• 14mm socket
• 10mm socket
• Pliers
• Small cross head screwdriver
• Large cross head screwdriver
• Straight head screwdriver
Recommended
• Piece of cloth
• Large sheet
• WD40 or similar
First of all if you are tackling the drivers seat, there is a electrical connector beneath the seat that will need to be disconnected, you do not have to worry about disconnecting the battery, but to be on the safe side, I'd suggest that you do not have your ignition on.
There are 4 bolts holding each seat in place, 2 at the front, 2 at the rear (the rear mounts are beneath plastic covers). You will need a 14mm socket to remove all the bolts. They are the same, so you do not have to worry about mixing them up.
Careful when removing the seat, you may want to lay a sheet over the door sill, to prevent unsightly scuffs should the worst happen.
Once you have got the seat out, you are in a position to start taking it to pieces. First of all, if you are working on the drivers seat, you will need to unclip the electrical connector at the base of the seat. Use some pliers to pinch the tabs at the back and pull the connector out.
Using a small cross head screwdriver, remove the 2 screws holding on the plastic trim on the outside edge of the seat.
Using a 14mm socket remove the bolts attaching the seat runner, there are 3 each side.
The seat runner assembly looks like this
Next you will need to remove the metal brackets that hold the runner to the seat. Using a 10mm socket remove all 6 bolts.
Turning the seat on it's side you need to take off the winder handle, this just pulls off, no need to remove the circular inner cover...
With a straight head screwdriver wrapped in cloth gently prise off the plastic trim, the fixing points are circled. I recommend getting the end of the screwdriver as close as possible to these points or you will run the risk of snapping the trim. You will need to do this to both sides of the seat.
With a straight head screwdriver, tap the retaining spring clips off, again you need to do this to both sides of the seat.
You are now in the position to remove the seat base from the back, first of all, hinge the seat as you would for letting someone in the rear of your car. Then pull the hinge part whilst pushing away the seat back with your thumb, you really need to do both sides simultaneously, but I couldn't show you that as I do not have a third arm to take a photo.
Time to break out the WD40, as this next fixing is a hard one, why Recaro use a cross head screw rather than a bolt is beyond me... :roll: Spray the fixing sparingly to avoid getting it on your seats, leave for a few minutes to allow the WD40 to penetrate the thread. Then with a large cross head screwdriver, undo the screw whilst trying not to round off the head. Once removed, this allows you to remove all the pieces of plastic trim with it.
This next part probably isn't essential although it only takes a few minutes and makes your life easier later on... Turn the seat base upside down and unhook the 2 central hooks using a small straight head screwdriver. Then at the front edge of the seat, there is a black plastic U channel holding the seat swab to the main frame, slide this downwards, it feels a little stuck on, but will come off with some persistence. The swab can now be eased away from the frame, careful not to bend the foam. A U channel is at the back edge of the seat, much the same as the front edge, unhooking this will release the seat swab from the base.
Now for removing the bolster itself, there are two stiff metal wires running the length of the bolster that hook into tabs, these are the only things holding the bolster on.... Here comes the messy part where bits of foam fall out all over the place (you have been warned). Starting with the inside edge, unhook the wire from the 3 tabs by pushing the wire downwards and inwards, should be clear when you're doing it.
Some of the bolster material is stuck to the frame at the front and back edge, gently pull this away from the metal.
Finally turning the seat base upside down, using a straight headed screwdriver pry open the 6 tabs just enough to allow the wire to be removed. I'd suggest trying to remove the wire from the tabs in the middle first as it's easier. If you can't use just your fingers, you may want to try pushing it with a screwdriver.
That's it, the bolster padding and cover can be removed from the metal frame. I'd recommend starting at the back where the two cut outs are. Once removed you may want a bit of a tidy up as the foam goes everywhere....
If you didn't buy a new cover You may want to give yours a good scrub, I drowned mine in the bath using a lot of cleaning product and it came up very well indeed.
I fitted my new bolster into the cover whilst it was pretty wet, as I feared it shrinking as it dried out. Note: I did NOT have to cut the bolster supplied by Capitol Seating at all. Spend a few minutes trying to get the front two thirds of the bolster sitting nicely in the cover, then slip the back edge into the cover (the thin bit), it will probably buckle and hang out the bottom a little bit, but don't worry too much. Hook the bolster back over the frame and try and get it sitting as best as you can. Re-attach the wire on the inside edge first, this should be fairly easy, then turn the seat over and using quite a bit of force hook the wire back onto the 6 tabs. Once you have done this hopefully your cover will be nice and tight. Bend the tabs back down to secure the bolster in position....
Then all you have to do is, put it all back together again...
----------------------------------------------
Here's how my seats turned out after a very thorough clean, they have come up far better than I could of hoped.
Seats removed
Old, New and cover
Lower bolster before
Lower bolster after
Upper bolster before
Upper bolster after
Some VERY clean seats...
